This is coming from the w3schools.com resource. Click on the link or or the image to access additional resources.
Table of Contents:
Any word that is greyed out and  underlined  represents a "tooltip." You can hover over it and see some additional information about that particular term. Any edits to that functionality can be investigagted by heading out to tooltipster.com.
A) The ng-app, ng-model and ng-bind Directives A) Curly Braces A) Break it Down Up to now we've mentioned AngularJS Directives in their most basic context as far as what's needed to get some rudimentary AngularJS functionality off the ground. Now, let's dig a little deeper. A) ng-app, ng-init, ng-model B) Data Binding C) Create Your Own Directives 1) Restrict Your Directives The ng-model directive binds the value of HTML controls (input, select, textarea) to application data. A) Basic Example B) Two Way Binding C) Validate User Input D) Application Status E) CSS Classes The ng-model directive binds data from the model to the view on HTML controls (input, select, textarea). A) Data Model B) HTML View C) Two-Way Binding A slight pause in order to reinforce the basics that have been covered thus far. A) Directives 1) app 2) init 3) model B) Basic Concepts 1) Binding and Expressions 2) Models, Modules and Controllers A) Objects B) External Files and Methods Adding a little more depth to the way in which we've looked at scopes thus far. A) MVC Illustration B) Scope Usage 1) Arguments and Parameters C) Root Scope Filters can be added to expression by using the pipe character (|), followed by a filter. A) JS Filters 1) uppercase 2) order by 3) filter by 4) user input (very cool) 5) table sorter 6) custom sorter A) DOM Review 1) DOM 2) node 3) Object B) Location C) http Service D) Timeout Service E) Interval Service F) Custom Service G) Custom Service w/ Filter This is an Angular service that reads data from remote servers. We went over this earlier in the context of "Services." A) Simple "GET" B) Methods C) Properties 1) Error Messages 2) JSON You're grabbing the content from "customers.php" using the "http.get" service, but now you're displaying it in a table with some cool little enhancments. A) Basic Table 1) CSS Styling 2) orderByFilter 3) uppercaseFilter 4) Add Index 5) Using $odd or $even We're using the Angular "ng-options" to pull this off.. A) Basic Example B) Options vs Repeat 1) ng-repeat w/ a String 2) ng-repeat w/ Object C) Data Source as an Object 1) The Value in a "Key-Value" Pair 2) The Property Value of the Value Object Retrieving data from a database is absolutely no problem, you've just got to make sure that it's being returned in a JSON format. A) MySQL B) Other Databases You can use directives to bind application data to the attributes of HTML DOM elements. A) ng-disabled B) ng-show / ng-hide AngularJS has its own HTML events directives. A) List of Event Listeners 1) Mouseover 2) ng-click i) ng-click -> function 3) $event object Forms in AngularJS provide data-binding and validation of input controls. Cool stuff! A) Data Binding 1) Input Text 2) Checkbox 3) Radio Button / SELECT 4) Form Application With Angular you've got a pretty verbose way of validating form input. A) Field Required / Email Validation B) Form and Input State Angular API is a set of global JavaScript functions for performing some basic tasks... A) Examples (lowercase, uppercase, isString, isNumber) W3.CSS is a modern CSS framework that features built in resposiveness. And, it plays very nicely with Angular...! A) Example of Form Using Angular and W3.CSS With Angular JS, you can include HTML content using the ng-include directive... A) Basic Example B) Include Cross Domains C) Include Cross Domains Make things move, baby...! A) Basic Example B) Angular Classes C) CSS Transitions & Animations 1) CSS Transitions 2) CSS Animations Routing allows you to navigate to other pages in your site without having to reload the site. A) Basic Example 1) Route Module 2) The ngRoute Dependency 3) ng-view Directive 4) $routeProvider B) Controllers C) Templates Now we're going to put all of this together and build a real world application using AngularJS. Here we go! A) My Shopping List 1) Create List of Products 2) Add Inputs 3) Remove Items 4) Error Handling 5) Add Some Style
You set this up using the https://ajax.googleapis.com/ajax/libs/angularjs/1.6.4/angular.min.js in your header. Be aware that the process of introducing an Angular dynamic into a page is a process referred to as "auto-bootstrapping." You'll see that spelled out below, but it's good to be aware of this terminology. A) Auto Bootstrapping (back to top...) Here's a great article from https://www.quora.com/What-are-the-differences-between-bootstrap-and-angular-js that spells out the difference between "auto-bootrapping" and Bootstrap.
Bootstrap: What it is? It is a set of well structured CSS styles, Grid classes and JavaScript components. The people at Twitter developed it and now it's a part of open source community and almost any personal project or startup project uses it. These common tools including styles, css classes, javascript components helps us to develop at a faster pace especially for those who doesn't have experience in frontend development. What it's not? It's not a frontend framework which provides structure to your application or common functionality like routing, controllers and models, MVC architecture etc. AngularJS: What it is? It is developed and maintained by Google and is one of the top 3 JavaScript Frameworks out there. It provides set of components to structure your app and organize the project. Made for ambitious JavaScript Single Page Applications, AngularJS provides tools to make life of Frontend Developers easier by providing set of guidelines and architecture to application. What it's not ? It doesn't provide CSS styles, Grid classes or JavaScript components like Modal, Tabs, Navigation Bar, Dropdown menu etc. As far as "Auto Bootstrapping," here you go: Angular initializes / bootstraps automatically upon DOMContentLoaded event or when the angular.js script is downloaded to the browser and the document.readyState is set to complete. At this point AngularJS looks for the ng-app directive. When the ng-app directive is found then Angular will:
  • Load the module associated with the directive.
  • Create the application injector.
  • Compile the DOM starting from the ng-app root element.
  • This process is called auto-bootstrapping.
<html> <body ng-app="myApp"> <div ng-controller="Ctrl">Hello {{msg}}!</div> <script src="https://ajax.googleapis.com/ajax/libs/angularjs/1.4.5/angular.min.js"></script> <script> var app = angular.module('myApp', []); app.controller('Ctrl', function($scope) { $scope.msg = 'Nik'; }); </script> </body> </html> AngularJS - Manual Bootstrapping : You can manually initialized your angular app by using angular.bootstrap() function. This function takes the modules as parameters and should be called within angular.element(document).ready() function. The angular.element(document).ready() function is fired when the DOM is ready for manipulation. <html> <body> <div ng-controller="Ctrl">Hello {{msg}}!</div> <script src="https://ajax.googleapis.com/ajax/libs/angularjs/1.4.5/angular.min.js"></script> <script> var app = angular.module('myApp', []); app.controller('Ctrl', function($scope) { $scope.msg = 'Nik'; }); //manual bootstrap process angular.element(document).ready(function () { angular.bootstrap(document, ['myApp']); }); </script> </body> </html> Note :
  • You should not use the ng-app directive when manually bootstrapping your app.
  • You should not mix up the automatic and manual way of bootstrapping your app.
  • Define modules, controller, services etc. before manually bootstrapping your app as defined in above examples.
Head out to these links for more reference material: donettricks.com, stackoverflow, JSFiddle
A) The ng-app, ng-model and ng-bind Directives (back to top...) From W3 Schools.com: "AngularJS directives are extended HTML attributes with the prefix ng- . The ng-app directive initializes an AngularJS application. The ng-init directive initializes application data. The ng-model directive binds the value of HTML controls (input, select, textarea) to application data." You've got a couple of "ng directives" to consider. Check this out: <div ng-app=""> // this tells AngularJS that this div has an AngularJS app attached to it <p>Input something in the input box:</p> <p>Name: <input type="text" ng-model="name"></p> //the "model" directive is directing traffic and in this case it's saying that this input is "bound" to the AngularJS application variable that, in this instance, is called, "name" <p ng-bind="name"></p> the "bind" directive couples / binds the innerHTML of the <p> element to the application variable called "name" </div> Here's what that looks like:

Input something in the input box:

Name:

B) The ng-init Directive(back to top...) You use the "ng-init" syntax to initialize AngularJS variables. Here's what that looks like using "valid" HTML: Like this: <div data-ng-app="" data-ng-init="firstName='John'"> <p>The name is <span data-ng-bind="firstName"></span></p> </div> Here's what that looks like:
You can do the same thing with a more "pure" approach to Angular by doing it this way: <div ng-app="" ng-init="firstName='John'"> <p>The name is <span data-ng-bind="firstName"></span></p> </div> A) Curly Braces Angular JS expressions are written inside double curly braces like this {{ expression }} and Angular will output the data exactly where the expression is written. It looks like this:
<div ng-app=""> <p>My first expression is {{5 + 5 }}</p> </div> ...and you can use Angular expression syntax to bind AngularJS data to HTML elements just like the ng-bind directive...
<div ng-app=""> <p>Name: <input type ="text" ng-model="name"></p> <p>{{name}}</p> </div> AngularJS modules define AngularJS applications and AngularJS controllers control AngularJS applications.
The code looks like this:
  1. <div ng-app="myApp" ng-controller="myCtrl">
  2. First Name: <input type="text" ng-model="firstName"><br>
  3. Last Name: <input type="text" ng-model="lastName"><br>
  4. <br>
  5. Full Name: {{firstName + " " + lastName}}
  6. </div>
  7. <script>
  8. var app = angular.module('myApp', []);
  9. app.controller('myCtrl', function($scope) {
  10. $scope.firstName= "John";
  11. $scope.lastName= "Doe";
  12. });
  13. </script>
A) Break It Down...! (back to top...) The first thing you're doing is defining the application: var app=angular.module('mApp', []); Once you've defined the app, you then build on that and go on to define the Controller... app.contoller('myCtrl', function($scope) { $scope.firstName="John"; $cope.lastName="Doe"; }); Now when you throw your HTML into the mix, you've got a cool, little responsive application happening... <div ng-app="myApp" ng-controller="myCtrl"> //here's your "twenty thousand foot" directive, as far as defining your app and your controller First Name: <input type="text" ng-model="firstName"><br> Last Name: <input type="text" ng-model="lastName"><br> <br> Full Name: {{firstName + " " + lastName}} // notice the curly braces indicating an expression </div> //and then down here is where you're putting your actual script for the controller functionality. Notice too that the "ng-app" directive tells AngularJS that the <div> element is the "owner" of the AngularJS application. Up to now we've mentioned AngularJS Directives in their most basic context as far as what's needed to get some rudimentary AngularJS functionality off the ground. Now, let's dig a little deeper. A) ng-app, ng-init, ng-model (back to top...) Here's an example:
...and here's the code: <div ng-app="" ng-init="firstName='John'"> the "ng-app" directive defines the app and it also tells AngularJS that the <div> element is the "owner" of the AngularJS application <p>Name: <input type="text" ng-model="firstName"></p> <p>You wrote {{firstName}}</p> //the "{{firstName}}" expression is an AngularJS binding expression. {{firstName}} is bound with the ng-init directive </div> B) Data Binding (back to top...) Speaking of "data binding..." You can get downright jiggy with it where Data Binding is concerned. Here's an example of how you can bind two text fields with two ng-model directives:
The code for this breaks down as follows: <div ng-app="" ng-init="quantity=1;price=5"> //the "ng-app" directive tells AngularJS that the <div> element is the "owner of the AugularJS expression Quantity: <input type="number" ng-model="quantity"> Costs: <input type="number" ng-model="price"> Total in dollar: {{ quantity * price }} </div> //the "ng-init" directive binds both the quantity and the price variable C) Repeating HTML Elements (back to top...)
Here's the code: <div ng-app="" ng-init="names=['Jani','Hege','Kai']"> <ul> <li ng-repeat="x in names"> {{ x }} </li> </ul> </div> The "ng-repeat" directive actually clones HTML elements once for each item in a collection. Look and see how it works with an array...
And here's that code: <div ng-app="" ng-init="names=[ {name:'Jani',country:'Norway'}, {name:'Hege',country:'Sweden'}, {name:'Kai',country:'Denmark'}]"> <ul> <li ng-repeat="x in names"> {{ x.name + ', ' + x.country }} </li> </ul> </div> C) Create Your Own Directives (back to top...) In addition to all of the pre-fabricated directives, you can create your own by using the .directive function. To invoke the new directive, you make an HTML element with the same tag name as the new directive. The only difference is that you'll name the HTML element w3-test-directive and you'll name the directive itself w3TestDirective. Check it out:
And here's the code: <body style="white-space: normal;" ng-app="myApp"> <w3-test-directive></w3-test-directive> <script> var app=angular.module("myApp", []); app.directive("w3TestDirective", function() { return { template:"<h1>Made by a directive</h1>" }; }); </script> </body> ...pretty cool! And you can invoke an directive by using an Attribute: <div w3-test-directive></div> ...or a Class: <div class="w3-test-directive"></> You can also restrict your directives to only be invoked by some of the methods. Click here to see that in action... 1) Restrict Your Directives In some instances, you may want to  restrict  the way in which the directive can be invoked. For example, say you had this on your page: <w3-test-directive></w3-test-directive> //element <div w3-test-directive></div> //attribute You've got an an element and an attribute with the same name. If you wanted to see your directive invoked only by the attribute, you would code it like this: var app = angular.module("myApp", []); app.directive("w3TestDirective", function() { return { restrict : "A", template : "<h1>Made by a directive!</h1>" }; }); The legal restrict values are: A) Basic Example With the "ng-model" directive, you can bind the value of an input field to a variable created in AngularJS. Check it out: <div ng-app="myApp" ng-controller="myCtrl"> Name: <input ng-model="name"> </div> <script> var app = angular.module('myApp', []); app.controller('myCtrl', function($scope) { $scope.name="John Doe"; // with this one line of code, I'm dictating the value inside the input field above }); </script> B) Two Way Binding (back to top...) When you first look at the above code in practice, it's not that exciting. It just looks like an input field with a default value of "John Doe." But this works both ways. In the example above, the user can't change anything because the value is dictated by the "scope" formula. But you can set it up where the user can change the value and that will look like this: <div ng-app="myApp" ng-controller="myCtrl"> Name: <input ng-model="name"> <h1>You entered: {{name}}</h1> </div> <script> var app = angular.module('myApp', []); app.controller('myCtrl', function($scope) { $scope.name = "John Doe"; }); </script> In real time, it looks like this:
C) Validate User Input (back to top...) One of the practical ways in which you can use the "ng-model" directive is with data validation such as email, number and "required." Like this: <form ng-app="" name="myForm"> Email: <input type="email" name="myAddress" ng-model="text"> <span ng-show="myForm.myAddress.$error.email">Not a valid email address</span> </form> That looks like this:
D) Application Status (back to top...) Another way in which can be used is to evaluate the status of a certain field. For example (once again), an email field: <form ng-app="" name="myForm" ng-init="myText = 'post@myweb.com'"> //define the app (ng-app) and the ng-init initializes the variable "myText" and gives it a value of "post@myweb.com" Email: <input type="email" name="myAddress" ng-model="myText" required> //the ng-model directive binds the "myText" variable to itself <p>Edit the e-mail address, and try to change the status.</p> <h1>Status</h1> <p>Valid: {{myForm.myAddress.$valid}} (if true, the value meets all criteria).</p> //pre-manufactured functionality being switched on using $valid <p>Dirty: {{myForm.myAddress.$dirty}} (if true, the value has been changed).</p> <p>Touched: {{myForm.myAddress.$touched}} (if true, the field has been in focus).</p> </form> And here's how that looks:
E) CSS Classes (back to top...) You can also guide and direct CSS classes like this:
The idea here is that the background color of the text field remains light blue (invalid) until the user populates with some kind of data. Here's the code: <style> input.ng-invalid { background-color:lightblue; } </style> <form ng-app="" name="myForm"> Enter your name: <input name="myName" ng-model="myText" required> <span ng-show="myForm.myAddress.$error.email">Not a valid e-mail address</span> </form> You've got several classes to choose from as far as the way in which the ng-model can add or remove classes... - ng-empty - ng-not-empty - ng-touched - ng-untouched - ng-valid - ng-invalid - ng-dirty - ng-pending - ng-pristine The ng-model directive binds data from the model to the view on HTML controls (input, select, textarea). A) Data Model (back to top...) AngularJS applications usually have a data model which is a collection of data that's available for that particular app. var app=angular.module('myApp', []); app.controller('myCtrl', function($scope) { $scope.firstname="John"; $scope.lastname="Doe"; } B) HTML View (back to top...) You then "bind" that data to specific HTML elements to "view" what the smoke is going on... <p ng-bind="first_name"></p> ...and you can also use curly braces: <p>First name: {{firstname}}</> For example:
What you're looking at is this: <script> var app = angular.module('myApp', []); app.controller('myCtrl', function($scope) { $scope.firstname = "John"; $scope.lastname = "Doe"; }); </script> <div ng-app="myApp" ng-controller="myCtrl"> <p>{{firstname}}</p> </div> C) Two-Way Binding (back to top...) What's great is that you can also syncronize things in a way where you're using a text field and the value of that field can be changed OR it can be dictated by the Controller. By using a "two way binding" approach, you've got the best of both worlds working simultaneously. So, instead of the <p> element, you've got this: <div ng-app="myApp" ng-controller="myCtrl"> <input ng-model="lastname"> <h1>{{lastname}}</h1> </div> ...and that looks like this:
A slight pause in order to reinforce the basics that have been covered thus far. A) Directives (back to top...) 1) app (back to top...) First, you've got the "app" which will be a <div>. It's the div that serves as the parameters within which you've got your AngularJS application. <div> ng-app=""div</> 2) init (back to top...) "init" is basically inititializing some AngularJS data and simultaneously giving it a name so it can be utilized in the context of an AngularJS app. Like this: <div ng-app="" ng-init="firstName='John'"> <p>Name: <input type="text" ng-model="firstName"></p> 3) model (back to top...) 
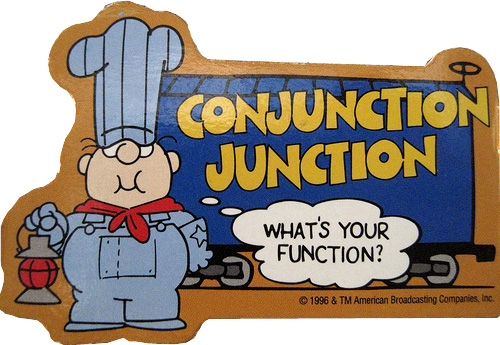
The "model" - think of "Conjuction Junction" in that you're hooking things up. But instead of phrases and clauses, you're hooking HTML elements to AngularJS data. Take, for example, an input field: <input type="text" size="23" ng-model="firstName"> In this case, you've got an input field and you're using the "model" directive to link together the AngularJS data called "firstName" to the input field HTML element. There are actually a great number of "directives" and you can see a comprehensive list by clicking here What we've just looked at are the basic directives needed to get a rudimentary AngularJS app up and running. Real quick, let's do a rapid-fire summary of what we've looked at thus far that builds on those three elements. B) Basic Concepts (back to top...) 1) Binding and Expressions (back to top...) An AngularJS expression is the syntax used that allows AngularJS to "express" itself. In the example above we initialized a variable and a value for that variable with ng-init="firstName='John'" If we want to "express" that variable / value, we simply write {{ firstName }}. The curly braces are what defines an expression as just that. The "binding" aspect of things comes into play just like mentioned earlier in the context of "models" in that you're "binding" or "coupling" HTML elements with AngularJS variables. So, with the paragraph example we were working with before, we can do this: <div ng-app="" ng-init="firstName='Bruce'"> <input type="text" size="23" ng-model="firstName" value="{{firstName]]"> <p>{{ firstName }}</p> You see how we initialized the variable and the value of "firstName?" We then "bound" the <p> element to the "firstName" variable and when you see this happening in real life, you see the name, "Bruce" show up on the page. It actually shows up twice: Once in the input text field and once in the paragraph element that the "firstName" dynamic has been bound to. When I change the value of the input field, it also changes the value in the AngularJS "firstName" var. This is what was referred to as "Two-Way Binding." 2) Models, Modules and Controllers (back to top...) For whatever reason, "models," "modules" and "controllers" seem to run into one another as far as their meaning and functionality. Again, "model" is a directive and we used the "Conjuction Junction" illustration to describe it. Similiar to the MVC architecture, it's dealing with data and its job is to couple AngularJS data with its corresonding HTML element. In that way, you can see the "ng-model" directive is similiar to the "view" in MVC. This is what we did a mere moment ago when we asserted the "ng-model" dynamic into the input text element. A "module" and a "controller" go together. Think of a module as a container. Within that container you've got your "controller." If you think in terms of MVC, your "controller" is just like what you envision when you think of an MVC architecture in that your "Controller" in AngularJS is bringing your data and your GUI together. Take note how now we're going to give the "ng-app" directive a value. That value will refer to the HTML element in which the app will run. Here's an example: <div ng-app="myApp" ng-controller="myCtrl">// you're going to assert a "controller" into the picture now {{ firstName + " " + lastName }} </div> <script> var app = angular.module("myApp", []); // you're going to use "angular.module" to define your module app.controller("myCtrl", function($scope) { $scope.firstName="John"; $scope.lastName="Doe"; }); </script> That's enough for now, as far as review. Let's now pop the hood on some advanced info pertaining to Controllers. And, in case you're wondering, yes, we've used "$scope" but without really defining it. We're getting ready to do that. Buckle up! A) Objects (back to top...) We've already seen this syntax before, let's just break it down a little bit more: <div ng-app="myApp" ng-controller="myCtrl">// you're defining the application, stating that it's going to run inside this particular div and you're also defining the controller for this application {{ firstName + " " + lastName }} </div> <script> var app = angular.module("myApp", []); // remember a "module" is a container. In this case, it's a container that holds the "myApp" appliation app.controller("myCtrl", function($scope) { // here's your controller (myCntrl) and you're invoking it with the $scope object $scope.firstName="John"; //the controller creates two properties in the $scope object $scope.lastName="Doe"; }); </script> An object in Javascript is simple a colleciton of properties... ...and a property is an association between a name (variable or key) and a value. A property's value can also be a function. Click here for more info. B) External Files and Methods (back to top...) You can have methods (variables as functions) in your controllers and you can also have all of that code parked somewhere else as an external file. For example, here's your controller: var app = angular.module('myApp', []); app.controller('personCtrl', function($scope) { $scope.firstName="John"; $scope.lastName="Doe"; $scope.fullName= function() { return $scope.firstName + " " + $scope.lastName; }; }); Instead of including that on your page and taking up space, you can just reference it like this: <script src="personController.js"></script> Just remember that on the actual ".js" file, you don't need <script></script>. Here's another example that's a little more advanced: <div ng-app="myApp" ng-controller="namesCtrl"> <ul> <li ng-repeat="x in names"> {{x.name+', ' + x.country}} </li> </ul> </div> <script src="namesController.js"> ...and then your "namesController.js" file looks like this: angular.module('myApp', []).controller('namesCtrl', function($scope) { $scope.names = [ {name:'Jani', country: 'Norway'}, {name: 'Hegi', country: 'Sweden'}, {name:'Kai', country: 'Denmark'} ]; }); Put it all together and you've got this:
Adding a little more depth to the way in which we've looked at scopes thus far. A) MVC Illustration (back to top...) If you were going to look at the components we've considered thus far, you've got your "module," your "model" and your "controller." So, if you got back to some of the previous examples...
//"scope" is an object consisting of properties and values and in that way it serves as your "model" when you're thinking in terms of MVC
var app = angular.module('myApp', []); app.controller('personCtrl', function($scope) { $scope.firstName="John"; $scope.lastName="Doe"; $scope.fullName= function() { return $scope.firstName + " " + $scope.lastName; }; }); B) Scope Usage (back to top...) When you make a "controller," you pass the $scope object as an argument. 1) Arguments and Parameters (back to top...) It's healthy to review these terms real quick. In a function, you've got two primary entities: A "parameter" and an "argument." A "parameter" is this: function(parameter, paramater) { do something... return something } An "argument" is a specific value that's passed in as one of the parameters. So, if you've got something like this: function id(x) { // "x" is a parameter return x; } When you invoke / call that function, you would pass a variable into the function in order for it to do what's designed to accomplish. In this instance, you might pass a word into it like this: function id('hello'); You would get "hello" back. The argument in this case, is "hello." For more info, click here. Now, going to back to AngularJS, you're passing the $object property into your controller as an argument. app.controller('personCtrl', function($scope) { C) Root Scope (back to top...) You have available to you something called "root scope" which looks like this:
<body ng-app="myApp"> The rootScope's favorite color is: {{color}}. <div ng-controller="myCtrl"> The scope of the controller's favorite color is: {{color}}. </div> <script> var app=angular.module('myApp', []); app.run(function($rootScope) { $rootScope.color='blue'; }); app.controller('myCtrl', function($scope) { $scope.color="red"; }); </script> </body>
And that will look like this:
BAM! Filters can be added to expression by using the pipe character (|), followed by a filter. A) JS Filters (back to top...) Here's a list of the filters that you have available... B) JS Filter Examples Check it out: 1) uppercase (back to top...) <div ng-app="myApp" ng-controller="personCtrl"> <p>The name is {{ lastName | uppercase }}</p> </div> <script> var app=angular.module('myApp', []).controller('personCtrl', function($scope) { $scope.firstName="Bruce", $scope.lastName="Gust" }); </script> The result of what you see above is: The name is GUST 2) order by (back to top...) You can add the "order by" filter and get the equivalent to a SELECT statement kind of thing: Here's the code: <div ng-app="myApp" ng-controller="namesCtrl"> <ul> <li ng-repeat="x in names | orderBy: 'country'"> {{ x.name + ', ' + x.country }} </li> </ul> </div> <script> var app=angular.module('myApp', []).controller('namesCtrl', function($scope) { $scope.names = [ {name:'Jani',country:'Norway'}, {name:'Carl',country:'Sweden'}, {name:'Margareth',country:'England'}, {name:'Hege',country:'Norway'}, {name:'Joe',country:'Denmark'}, {name:'Gustav',country:'Sweden'}, {name:'Birgit',country:'Denmark'}, {name:'Mary',country:'England'}, {name:'Kai',country:'Norway'} ]; }); </script> ...and here's what it looks like in person:
3) filter by (back to top...) This option gives you the ability to filter by a particular character. In this case, we're filtering out every name that contains the letter, "i." <div ng-app="myApp" ng-controller="namesCtrl"> <ul> <li ng-repeat="x in names | filter: 'i'"> {{ x }} </li> </ul> </div> <script> angular.module('myApp', []).controller('namesCtrl', function($scope) { $scope.names = [ 'Jani', 'Carl', 'Margareth', 'Hege', 'Joe', 'Gustav', 'Birgit', 'Mary', 'Kai' ]; }); </script> Here's what it looks like in person:
4) user input (very cool) (back to top...) By using the "test" filter, you can weed out different options simply by typing some criteria into a text box. Check it out: <div ng-app="myApp" ng-controller="namesCtrl"> <p><input type="text" ng-model="test"></p> <ul> <li ng-repeat="x in names | filter : test"> {{ x }} </li> </ul> </div> <script> angular.module('myApp', []).controller('namesCtrl', function($scope) { $scope.names = [ 'Jani', 'Carl', 'Margareth', 'Hege', 'Joe', 'Gustav', 'Birgit', 'Mary', 'Kai' ]; }); </script> And here it is, live and in person! Just type some letters into the text field and the list will automatically shrink based on the criteria you enter.
5) table sorter (back to top...) All you have to do here is just click on the column name and you can sort things automatically. Very nice! Here's the code: <div ng-app="myApp" ng-controller="namesCtrl"> <table border="1" width="100%"> <tr> <th ng-click="orderByMe('name')">Name</th> <th ng-click="orderByMe('country')">Country</th> </tr> <tr ng-repeat="x in names | orderBy:myOrderBy"> <td>{{ x.name }}</td> <td>{{ x.country }}</td> </tr> </table> </div> <script> var app=angular.module('myApp', []).controller('namesCtrl', function($scope) { $scope.names = [ {name:'Jani',country:'Norway'}, {name:'Carl',country:'Sweden'}, {name:'Margareth',country:'England'}, {name:'Hege',country:'Norway'}, {name:'Joe',country:'Denmark'}, {name:'Gustav',country:'Sweden'}, {name:'Birgit',country:'Denmark'}, {name:'Mary',country:'England'}, {name:'Kai',country:'Norway'} ]; $scope.orderByMe = function(x) { $scope.myOrderBy=x; } }); </script> And here's the way it looks in real life:
6) custom sorter (back to top...) This is a bizarre example, but here it is: You can create custom filters. This one makes it where every other letter is uppercase:
<ul ng-app="myApp" ng-controller="namesCtrl"> <li ng-repeat="x in names"> {{x | myFormat}} </li> </ul> <script> var app = angular.module('myApp', []); app.filter('myFormat', function() { return function(x) { var i, c, txt = ""; for (i = 0; i < x.length; i++) { c = x[i]; if (i % 2 == 0) { c = c.toUpperCase(); } txt += c; } return txt; }; }); app.controller('namesCtrl', function($scope) { $scope.names = [ 'Jani', 'Carl', 'Margareth', 'Hege', 'Joe', 'Gustav', 'Birgit', 'Mary', 'Kai' ]; }); </script>
Sweet! Here's the real life picture:
A) DOM Review (back to top...) 1) DOM (back to top...) In HTML you have what is called the DOM, which stands for "Document Object Model." 2) node (back to top...) A "node," by definition, is "a point at which lines or pathways intersect or branch; a central or connecting point." So, in other words, it's a fancy way of describing a specific element. In the "DOM," you've got several "nodes." The document itself is a node, all of the HTML elements are nodes, text inside HTML elements are nodes. 3) Object (back to top...) Javascript uses that paradigm to facilitate the ability to target specific aspects of the page and it stores all that information in an "object" called "window." So, while in regular Javascript you would use "window.location," for example, as a "service" to direct the user to a different URL. With Angular, you're going to use something a little more verbose and effective. Here is where you'll pick things up... B) Location (back to top...) Here's a service that prints the absolute URL of the page you're looking at: <div ng-app="myApp" ng-controller="myCtrl"> The URL of this page is: <b>{{ myURL }} </b> </div> <br><br> This example is using the "$location" service to the get absolute URL of this page. <script> var app = angular.module('myApp', []); app.controller('myCtrl', function($scope, $location) { $scope.myURL = $location.absUrl(); }); </script> Real life...
C) http Service (back to top...) This is a common request in the world of Angular JS. Here you're reaching out to a server and grabbing some content / data. Check it out: <div ng-app="myApp" ng-controller="myCtrl"> Today's welcome message is coming from "wuddup.htm" and it reads: <br><br> {{myWelcome}} </div> <script> var app=angular.module('myApp', []); app.controller('myCtrl', function($scope, $http) { $http.get("wuddup.htm").then(function (response) { $scope.myWelcome = response.data; }); }); </script>< In real life, it's this:
Bear in mind that the "wuddup.htm" page is nothing more than "Wuddup, dog?" There's no html info or code besides the text. D) Timeout Service< (back to top...) You can use this service to display a message after two seconds: <div ng-app="myApp" ng-controller="myCtrl"> This message change after two seconds. Wait for it... <br><br> {{myHeader}} </div> <script> var app=angular.module('myApp', []); app.controller('myCtrl', function($scope, $timeout) { $scope.myHeader = "In 5-4-3-2-1..."; $timeout(function () { $scope.myHeader = "See? I told you!"; }, 2000); }); </script> And...
E) Interval Service (back to top...) You can use this to update a particular dynamic according to a specified timeframe. The most obvious application would that of a clock. Check it out: <div ng-app="myApp" ng-controller="myCtrl"> The current time is: <br><br> {{theTime}} </div> <script> var app=angular.module('myApp', []); app.controller('myCtrl', function($scope, $interval) { $scope.theTime = new Date().toLocaleTimeString(); $interval(function () { $scope.theTime = new Date().toLocaleTimeString(); }, 1000); //"1000" will equate to updating the current time every second }); </script> Real world demo:
F) Custom Service (back to top...) Here you're combining a service with a custom method, thus making it a unique, "customized" dynamic. With this function, we're converting a number into a hex value. <div ng-app="myApp" ng-controller="myCtrl"> The hexadecimal value of 255 is: <br><br> {{hex}} <br><br> This is a custom service that converts a given number into a hexadecimal value. </div> <script> var app=angular.module('myApp', []); app.service('hexafy', function() { this.myFunc = function(x) { return x.toString(16); } }); app.controller('myCtrl', function($scope, hexafy) { $scope.hex=hexafy.myFunc(255); }); </script> Here's what it looks like in real life:
F) Custom Service w/ Filter (back to top...) You can take the above service and assert it as a filter. Like this: <div ng-app="myApp" ng-controller="myCtrl"> Use a service as a filter when displaying the array [255, 251, 200]: <br><br> <ul><li ng-repeat="x in counts">{{x | myFormat}}</li></ul> <br><br> This filter uses a custom service that converts numbers into hexadecimal values. </div> <script> var app=angular.module('myApp', []); app.service('hexafy', function() { this.myFunc = function(x) { return x.toString(16); } }); app.filter('myFormat', ['hexafy', function(hexafy) { return function(x) { return hexafy.myFunc(x); }; }]); app.controller('myCtrl', function($scope) { $scope.counts= [255,251,200]; }); </script> The real deal:
This is an Angular service that reads data from remote servers. We went over this earlier in the context of "Services," but only in the context of an introduction. Here we get into some more verbose examples. A) Simple "GET" (back to top...) This, again, is a repeat of what we've already looked at... <div ng-app="myApp" ng-controller="myCtrl"> Today's welcome message is coming from "wuddup.htm" and it reads: <br><br> {{myWelcome}} </div> <script> var app=angular.module('myApp', []); app.controller('myCtrl', function($scope, $http) { $http.get("wuddup.htm").then(function (response) { $scope.myWelcome = response.data; }); }); </script>< In real life, it's this:
B) Methods (back to top...) You can write this in a different way that makes use of a shortcut method. There are actually several shortcut methods that include: These are all shortcuts. Take a look at what the above syntax looks like when you're employing the "get" method using a "shortcut" approach: var app=angular.module('myApp', []); app.controller('myCtrl', function($scope, $http) { $http({ method: "GET", url: "wuddup.htm" }).then(function mySuccess(response) { $scope.myWelcome = response.data; }, function myError(response) { $scope.myWelcome = response.statusText; }); }); The above example executes the $http service with an  object  as an  argument . The object is specifying the HTTP method, the url, what to do on success and what to do on failure. C) Properties (back to top...) The great thing about the http service is that it's an object which, as we know, is a collection of both properties and values. So when we invoke this method you are, by default, accessing a fair amount of data and that can be very cool. The response from the server, using the http service, is going to have these properties: Here's an example of that using the "wuddup.htm" example we've used in the last two sections:
<div ng-app="myApp" ng-controller="myCtrl"> Data: {{content}}<br> Status: {{statuscode}}<br> StatusText: {{statustext}} </div> <br>The response object has a number of properties. You're seeing a snippet of some of those listed above. <script> var app=angular.module('myApp', []); app.controller('myCtrl', function($scope, $http) { $http.get("wuddup.htm") .then(function (response) { $scope.content = response.data; $scope.statuscode = response.status; $scope.statustext = response.statusText; }); }); </script>
And in the real world, it looks like this:
1) Error Messages (back to top...) To handle errors, you just add one more function to the "then" method: var app=angular.module('myApp', []); app.controller('myCtrl', function($scope, $http) { $http.get("wrongfilename.htm") .then(function (response) { //first function, by default, handles what happens when it works $scope.content = response.data; $scope.statuscode = response.status; $scope.statustext = response.statusText; }, function(response) { // second function handle what happens when things go wrong $scope.content = "Something went south!"; }); });
2) JSON (back to top...) The whole gist of what we've been talking about here is how you can use the http service to retrieve data from remote servers. With the JSON service you're grabbing a JSON file from another server. Here's an example where we're grabbing a JSON entity from another page. Boom... <div ng-app="myApp" ng-controller="customersCtrl"> <ul> <li ng-repeat="x in myData"> {{ x.Name + ', ' + x.Country }} </li> </ul> </div> <script> var app=angular.module("myApp", []); app.controller('customersCtrl', function($scope, $http) { $http.get("customers.php"). then(function(response) { $scope.myData = response.data.records; }); }); </script> ...and in real life:
And here's the explanation: The application defines the customersCtrl controller, with a $scope and $http object. $http is an XMLHttpRequest object for requesting external data. $http.get() reads JSON data from https://www.w3schools.com/angular/customers.php. On success, the controller creates a property, myData, in the scope, with JSON data from the server. You're grabbing the content from "customers.php" using the "http.get" service, but now you're displaying it in a table with some cool little enhancments. A) Basic Table (back to top...) First of all, here's a basic table:
<div ng-app="myApp" ng-controller="customersCtrl"> <table> <tr ng-repeat="x in names"> <td>{{ x.Name }}</td> <td>{{ x.Country }}</td> </tr> </table> </div> <script> var app=angular.module("myApp", []); app.controller('customersCtrl', function($scope, $http) { $http.get("customers.php") .then(function(response) {$scope.names = response.data.records;}); }); </script>
And here it is in real life:
1) CSS Styling (back to top...) Now add some CSS to it (for the sake of efficiency, you can see the result above...) <style> table, th , td { border: 1px solid grey; border-collapse: collapse; padding: 5px; } table tr:nth-child(odd) { background-color: #f1f1f1; } table tr:nth-child(even) { background-color: #ffffff; } </style> Cool! 2) orderByFilter (back to top...) Now add an "order by" filter and you get something genuinely hip!
<div ng-app="myApp" ng-controller="customersCtrl"> <table> <tr ng-repeat="x in names | orderBy : 'Country'"> <td>{{ x.Name }}</td> <td>{{ x.Country }}</td> </tr> </table> </div> <script> var app=angular.module("myApp", []); app.controller('customersCtrl', function($scope, $http) { $http.get("customers.php") .then(function(response) {$scope.names = response.data.records;}); }); </script>
And in real life:
3) uppercaseFilter (back to top...) You can also add an upper case filter like this: <td>{{ x.Country | uppercase }}</td> - see above example for a demonstration of this syntax. 4) Add Index (back to top...) You can also add an index like this: <td>{{ $index + 1 }}</td> 5) Using $odd or $even (back to top...) Easy. Take a look... <table> <tr ng-repeat="x in names | orderBy : 'Country'"> <td ng-if="$odd" style="background-color:#f1f1f1;">{{ $index + 1 }}</td> <td ng-if="$even" style="background-color:#ffffff;">{{ $index + 1 }}</td> <td ng-if="$odd" style="background-color:#f1f1f1;">{{ x.Name }}</td> <td ng-if="$even" style="background-color:#ffffff;">{{ x.Name }}</td> <td ng-if="$odd" style="background-color:#f1f1f1;">{{ x.Country }}</td> <td ng-if="$even" style="background-color:#ffffff;">{{ x.Country | uppercase }}</td> </tr> </table> We're using the Angular "ng-options" to pull this off.. A) Basic Example (back to top...) Here's your basic SELECT box driven by an Angular dynamic: <div ng-app="myApp" ng-controller="myCtrl"> <select ng-model="selectedName" ng-options="x for x in names"> </select> </div> <script> var app=angular.module("myApp", []); app.controller('myCtrl', function($scope) { $scope.names=["Emil", "Tobias", "Linus"]; }); </script> And here it is in living color:
B) Options vs Repeat (back to top...) You can use the "ng-repeat" directive to create the same dropdown list. It looks like this: <select> <option></option> <option ng-repeat="x in names">{{x}}</option> </select> You can see it in the above example. 1) ng-repeat w/ a String (back to top...) You might be wondering, "What option do I use?" The "ng-repeat" has some limitations in that the selected value has to be a string: Here's some code to demonstrate that anomaly:
<div ng-app="myApp" ng-controller="myCtrl"> <p>Select a car...</p> <select ng-model="selectedCar"> <option></option> <option ng-repeat="x in cars" value="{{x.model}}">{{x.model}}</option> </select> <h1>You selected: {{selectedCar}}</h1> </div> <script> var app=angular.module("myApp", []); app.controller('myCtrl', function($scope) { $scope.cars=[ {model : "Ford Mustang", color : "red"}, {model : "Fiat 500", color : "white"}, {model : "Volvo XC90", color : "black"} ]; }); </script> <p>When you use the "ng-repeat" directive to create dropdown lists, the selected value must be a string.</p>
And here it is "for real..."
2) ng-repeat w/ Object (back to top...) With the "ng-options" approach, the selected option can be an option. Like this:
<div ng-app="myApp" ng-controller="myCtrl"> <p>Select a car...</p> <select ng-model="selectedCar" ng-options="x.model for x in cars"> </select> <h1>You selected: {{selectedCar.model}}</h1> <p>...and its color is: {{selectedCar.color}}!</p> </div> <script> var app=angular.module("myApp", []); app.controller('myCtrl', function($scope) { $scope.cars=[ {model : "Ford Mustang", color : "red"}, {model : "Fiat 500", color : "white"}, {model : "Volvo XC90", color : "black"} ]; }); </script>
With the "ng-options" directive, you've got more flexibility and you can hold more info within it, thus making your app more flexible. That's what we'll be using for the rest of this tutorial. C) Data Source as an Object (back to top...) Up to now we've been working with an array. Now, we're going to construct a SELECT with the incoming info being an object. Like this: $scope.cars = { car01: "Ford", car02: "Fiat", car03: "Volvo" }; So, now when we build our SELECT, x represents the key and y represents the value. Here you go...
1) The Value in a "Key-Value" Pair (back to top...) The selected value will still be the value in a key-value pair, even when the value is an object in and of itself. Here's the code:
<div ng-app="myApp" ng-controller="myCtrl"> <p>Select a car...</p> <select ng-model="selectedCar" ng-options="x for (x, y) in cars"> </select> <h1>You selected: {{selectedCar}}</h1> <h1>...the color is: {{selectedCar.model}}</h1> <h1>...and the color is {{selectedCar.color}}</h1> </div> <script> var app=angular.module("myApp", []); app.controller('myCtrl', function($scope) { $scope.cars = { car01 : {brand : "Ford", model : "Mustang", color : "red"}, car02 : {brand : "Fiat", model : "500", color : "white"}, car03 : {brand : "Volvo", model : "XC90", color : "black"} }; }); </script>
Here's the real deal:
2) The Property Value of the Value Object (back to top...) The options in the dropdown don't have to be the key in the "key-value" pair. It can also be the value or the property of the value object. So, whereas before you had this: <select ng-model="selectedCar" ng-options="x for (x, y) in cars"> ...now you've got this, which equates to a far more intuitive SELECT: <select ng-model="selectedCar" ng-options="y.brand for (x, y) in cars"> That change was made to the example above, so no need to demo that again... Retrieving data from a database is absolutely no problem, you've just got to make sure that it's being returned in a JSON format. A) MySQL (back to top...) 1) Your JSON Page (back to top...) You're basically setting up a page that's using whatever database protocol you've got and returning that data in a JSON format. For MySQL, it will look like this:
<?php header("Access-Control-Allow-Origin: *"); header("Content-Type: application/json; charset=UTF-8"); require_once("term_class_pdo.php"); $current_discipline=""; $new_list= new TermAdmin; $term_display=$new_list->term_list(); $output=""; foreach($term_display as $term) { if($output !="") { {$output.= ", ";} } $output.= '{"disicpline": "' . stripslashes($term['discipline']) .'", '; $output.= '"term": "' .stripslashes($term['term']) .'", '; $output.='"definition"; "'. stripslashes($term['definition']).'"}'; } $output = '{"records": ['.$output.']}'; echo $output; ?>
That's going to get you this:
{"records": [{"disicpline": "JQuery", "term": "Boilerplate", "definition"; "A Plugin is a JQuery object that does something cool. When you determine that you want to build your own plugin, which is very likely, you'll use what's called a "Boilerplate" to encapsulate your code so any potential redundancy between the syntax you use and code that exists elsewhere in your app doesn't conflict with one another. <br><br> This is fairly verbose, but it's not that difficult. Just buckle up... <br><br> // the semi-colon before function invocation is a safety net against concatenated<br> // scripts and/or other plugins which may not be closed properly.<br> <br><br> <b>;(function ( $, window, undefined ) {</b> // undefined is used here as the undefined global variable in ECMAScript 3 is<br> // mutable (ie. it can be changed by someone else). undefined isn't really being<br> // passed in so we can ensure the value of it is truly undefined. In ES5, undefined<br> // can no longer be modified.<br> // window and document are passed through as local variables rather than globals<br> // as this (slightly) quickens the resolution process and can be more efficiently<br> // minified (especially when both are regularly referenced in your plugin).<br> <br><br> // Create the defaults once<br> <b>var pluginName = "defaultPluginName",<br> document = window.document,<br> defaults = {<br> propertyName: "value"<br> };</b><br><br> The first thing you should notice is that these variable are defined outside of any functions � the IIFE doesn�t count � which limits the number of instances to 1 (as opposed to 1 for each time the plugin is called or a plugin object is instantiated) and it makes them available to everything within the IIFE. The first variable is pluginName, which should be the name of the function that you are extending jQuery with. It�s referenced on lines 32, 45, 47, and 48. This allows you to change the name of your plugin in one place rather than in all 4 of those places mentioned (and more places if you need to reference it within the code you write). The next variable is document, which is just a reference to the document � often used in jQuery plugins � which allows it to be shortened by minifiers again. The final variable is defaults. Most plugins give users options that they can send in to the plugin and this variable contains the default values for each of the options you offer. <br><br> // The actual plugin constructor<br> <b> function Plugin( element, options ) {<br> this.element = element;</b><br><br> // jQuery has an extend method which merges the contents of two or<br> // more objects, storing the result in the first object. The first object<br> // is generally empty as we don't want to alter the default options for<br> // future instances of the plugin<br> <b>this.options = $.extend( {}, defaults, options) ;<br> this._defaults = defaults;<br> this._name = pluginName;<br> this.init();<br> }</b> <br><br> This is the constructor for the object that will be doing all the heavy lifting in the plugin. The constructor is pretty minimal, mostly just creating a few instance properties and then leaving the rest up to init. Walking through, this.element holds the DOM element that this plugin is supposed to manipulate, this.options holds an object with all of the options that the user sent in and any defaults that weren�t overridden by the user. The rest are pretty self-explanatory. <br><br> <b>Plugin.prototype.init = function () {<br> // Place initialization logic here<br> // You already have access to the DOM element and the options via the instance,<br> // e.g., this.element and this.options<br> };</b><br><br> The init function where all the logic associated with this plugin�s initialization should be placed. <br><br> And finally...<br><br> // A really lightweight plugin wrapper around the constructor,<br> // preventing against multiple instantiations<br> <b>$.fn[pluginName] = function ( options ) {<br> return this.each(function () {<br> if (!$.data(this, 'plugin_' + pluginName)) {<br> $.data(this, 'plugin_' + pluginName, new Plugin( this, options ));<br> }<br> });<br> }</b>"}, {"disicpline": "JQuery", "term": "CDN", "definition"; "When you load the JQuery library into your page, rather than have the actual library sitting on your personal server, you'll refer to it using a CDN. <br><br> CDN stands for Content Development Network. It's a series of servers scattered around the world. When you use a URL such as this: <br><br> <script src="https://ajax.googleapis.com/ajax/libs/jquery/3.2.1/jquery.min.js"></script> <br><br> ...you're system is defaulting to the closest server in the network to access the JQuery library. <br><br> Click <a href="http://www.webopedia.com/TERM/C/CDN.html" target="_blank">here</a> for more info."}, {"disicpline": "JQuery", "term": "Constructor", "definition"; "A constructor is used to for initializing new objects. In really simplistic terms, it looks like this: <br><br> function Account () {<br> <i>your logic</i><br> }<br><br> ​// This is the use of the Account constructor to create the userAccount object.​ <br><br> ​var userAccount = new Account (); //notice the use of the word "new""}, {"disicpline": "JQuery", "term": "DOM", "definition"; "DOM stands for "Document Object Model." <br><br> In an HTML document, you've got any one of number of elements; <div>, <tr>, <span> etc. The way those things are represented and organized on a page is the "Document Object Model." In JQuery, that's significant because you're usually interacting with specific elements within the DOM and it's because of the structure and organization of the DOM that JQuery can be so useful."}, {"disicpline": "JQuery", "term": "Function Expression vs Function Declaration and IIFE", "definition"; "In JavaScript, there are two basic ways of invoking a function. The most common way is "declaration..." <br><br> function myFunction() { <i>logic here</i> } <br><br> The other way to do is referred to as an "expression" where the function is part of a larger chunk of syntax. Like this: <br><br> var somethingSpecial = function() { <i>logic here</i> } <br><br> You can also assign a function to a property (notice the placement of the curly braces); <br><br> var myObject = { <br><br> myFunction: function) {<i>logic here</i> } <br><br> }<br><br> Regardless if you're using the Definition or the Expression approach, in both instances you're having to instantiate it with a var or some kind of systemic step. <br><br> With IIFE (Immediately Invoked Function Expressions), you're "immediately" invoking the functionality. So, just as soon as the page is accessed, BOOM! All that code kicks on and you're up and running. The big thing, however, is that with IIFE you're able to isolate your code in a way where you can use "var" throughout and not worry about how "var" is used in other sections of your app causing name collisions. The code you would use for that would look like this: (function() { <i>logic here</i> })(); Click <a href="http://adripofjavascript.com/blog/drips/an-introduction-to-iffes-immediately-invoked-function-expressions.html" target="_blank">here</a> for more information. And here's another <a href="https://javascriptweblog.wordpress.com/2010/07/06/function-declarations-vs-function-expressions/" target="_blank">link</a> as well..."}, {"disicpline": "JQuery", "term": "IIFE", "definition"; "IIFE stands for "Immediately Invoked Function Expression. It's an anonymous function (no name attached to it) that is wrapped inside of a set of parentheses and called (invoked) immediately. This is some of the foundational logic that the Boilerplate dynamic is built upon. For more info, click <a href="http://gregfranko.com/blog/i-love-my-iife/" target="_blank">here</a>."}, {"disicpline": "JQuery", "term": "JQuery", "definition"; "Jquery is a library of JavaScript. What would otherwise represent mountains of code is now simply referred to in the context of JQuery functions. <br><br> You'll load the JQuery library in your header like this: <br><br> <script src="jquery-3.2.1.min.js"></script> <br><br> Now, you've got access to all kinds of functionality that would otherwise require thousands of lines of code."}, {"disicpline": "JQuery", "term": "min", "definition"; ""min" stands for "minify." <br><br> The Jquery library with all of the expected white space and line breaks equates to a pretty big file. "min" removes all of the white space. It's really hard to read, but it takes up less room."}, {"disicpline": "JQuery", "term": "Object", "definition"; "A JQuery object is a var, but a whole lot more. <br><br> For example, if you have 3 TEXTAREA elements on the page and you do this: <br><br> var j = $('textarea'); <br><br> then this j jQuery object will contain these properties: <br><br> 0 - reference to the first TEXTAREA element<br> 1 - reference to the second TEXTAREA element<br> 2 - reference to the third TEXTAREA element<br> length - which is 3<br> context - reference to the document object<br> selector - which is 'textarea<br>'"}, {"disicpline": "JQuery", "term": "Plugin", "definition"; "A plugin is a piece of JQuery code that does something cool. There's a whole registry of them that you can access but sometimes you want to create your own plugin in that you're able to create a piece of functionality once and then use it repeatedly without having to rewrite it every time. <br><br> Let's say we want to create a plugin that makes text within a set of retrieved elements green. All we have to do is add a function called greenify to $.fn and it will be available just like any other jQuery object method. <br><br> $.fn.greenify = function() {<br> this.css( "color", "green" );<br> };<br><br> $( "a" ).greenify(); // Makes all the links green.<br><br> Cool! Click <a href="https://learn.jquery.com/plugins/basic-plugin-creation/" target="_blank">here</a> for more info."}, {"disicpline": "JQuery", "term": "Property", "definition"; "A Property is a variable defined within a function. <br><br> Click <a href="https://www.w3schools.com/js/js_properties.asp" target="_blank">here</a> for more detailed info."}, {"disicpline": "JQuery", "term": "Scope", "definition"; "<i>Scope</i> in JavaScript is similar to "visibility" in OOP in that it refers to accessibility within your app. <br><br> <u>Global</u> means that whatever it is that you're creating or defining is available and accessible anywhere, anytime throughout your entire application. An example would be: <br><br> // global scope<br> var name = 'Todd';<br><br> <u>Local</u> means that the entity in question is available only within the function it was created in. Like this: <br><br> //global scope out here...<br><br> var myFunction = function () {<br> //local scope in here<br> var name = 'Todd';<br> console.log(name); // Todd<br> };<br><br> // Uncaught ReferenceError: name is not defined because you're referring to a var that is "local" in scope console.log(name); For more info, click <a href="https://toddmotto.com/everything-you-wanted-to-know-about-javascript-scope/" target="_blank">here</a>"}, {"disicpline": "JQuery", "term": "Selector", "definition"; "A Selector in JQuery is what you're using systemically to grab a particular element within the DOM, like a <div> or a specific field that has a unique id. <br><br> Like this: <br><br> var theDiv = $("#theDiv"); <br><br> Now, remember, "theDiv" is a JQuery object which is very cool in that it's more than just a variable. It has properties and other systemic features that can be very cool when it comes to programming. <br><br> Click <a href="http://tutorials.jenkov.com/jquery/selectors.html" target="_blank">here</a> for more info."}, {"disicpline": "JQuery", "term": "use strict", "definition"; ""use strict" is a piece of code that tells the system not to be sloppy in the way it processes your code. In this way, you're able to avoid some errors that might otherwise occur if the system is being too forgiving. <br><br> Strict mode makes it easier to write "secure" JavaScript. <br><br> Strict mode changes previously accepted "bad syntax" into real errors. <br><br> As an example, in normal JavaScript, mistyping a variable name creates a new global variable. In strict mode, this will throw an error, making it impossible to accidentally create a global variable. <br><br> In normal JavaScript, a developer will not receive any error feedback assigning values to non-writable properties. <br><br> In strict mode, any assignment to a non-writable property, a getter-only property, a non-existing property, a non-existing variable, or a non-existing object, will throw an error. <br><br> Click <a hrer="https://www.w3schools.com/js/js_strict.asp" target="_blank">here</a> for more info."}, {"disicpline": "Laravel", "term": "Installation", "definition"; "definition"}, {"disicpline": "NET", "term": "API", "definition"; ""Application Programming Interface." A fancy term to describe all of the builiding blocks that combine to form a computer program of some sort. <br /><br /> <div class="quote">In computer programming, an application programming interface (API) is a set of subroutine definitions, protocols, and tools for building application software. In general terms, it's a set of clearly defined methods of communication between various software components.<br /><br /> What makes API such an advantage is the way it serves as a "one stop shop" for your business logic so you're not having to reinvent the wheel for every browser, OS etc.</div>"}, {"disicpline": "NET", "term": "double", "definition"; "<em>double</em> refers to numbers with decimal points."}, {"disicpline": "NET", "term": "floating point", "definition"; "Numbers in the computer world are stored as Binary values. In Binary (1's and 0's), you've got a decimal point that "floats." It's not like your typical decimal point in the way it affects the precision of the number. Rather, it's defining the number itself.<br /><br />For example, the number "4" could potentially look like this as a Binary value: 0000101100. The placement of a decimal point affects the value of that number in whole integers. Compare that to a regular decimal point where you're reflecting precision."}, {"disicpline": "NET", "term": "HTTP", "definition"; "Hypertext Transport Protocol. This is the set of rules and protocols the web uses to transport information over the web.<br /><br /> <div class="quote">HTTP (Hypertext Transfer Protocol) is the set of rules for transferring files (text, graphic images, sound, video, and other multimedia files) on the World Wide Web. As soon as a Web user opens their Web browser, the user is indirectly making use of HTTP. HTTP is an application protocol that runs on top of the TCP/IP suite of protocols (the foundation protocols for the Internet) (<a href="http://searchwindevelopment.techtarget.com/definition/HTTP" target="_blank">techtarget</a>). <br /><br /> Basically, you're looking at a hierarchy of digital platforms that combine to provide a web based experience. It looks like this: <br /><br /> <div style="text-align: center;">TCP / IP (<a href="http://searchnetworking.techtarget.com/definition/TCP-IP" target="_blank">Transport Control Protocol / Internet Protocol</a>) -> HTTP -> HTML</div> </div>"}, {"disicpline": "NET", "term": "JSON", "definition"; "Javascript Object Notation. It's Javascript's way of packaging data... <br /><br /> <div class="quote">JSON (JavaScript Object Notation) is a lightweight data-interchange format. It is easy for humans to read and write. It is easy for machines to parse and generate. It is based on a subset of the JavaScript Programming Language, Standard ECMA-262 3rd Edition - December 1999. JSON is a text format that is completely language independent but uses conventions that are familiar to programmers of the C-family of languages, including C, C++, C#, Java, JavaScript, Perl, Python, and many others. These properties make JSON an ideal data-interchange language. (<a href="http://json.org" target="_blank">JSON.org</a>)</div>"}, {"disicpline": "NET", "term": "LAMBA", "definition"; "This is something you'll encounter from time to time as part of the "app.run" portion of the Configure Construct in your Startup Class. <a href="https://www.codeproject.com/tips/298963/understand-lambda-expressions-in-minutes" target="_blank">Code Project</a> defines it like this: <br /><br /> <div class="quote">A lambda expression is an anonymous function and it is mostly used to create delegates in LINQ. Simply put, it's a method without a declaration, i.e., access modifier, return value declaration, and name. <br /><br /> Convenience. It's a shorthand that allows you to write a method in the same place you are going to use it. Especially useful in places where a method is being used only once, and the method definition is short. It saves you the effort of declaring and writing a separate method to the containing class.</div>"}, {"disicpline": "NET", "term": "LINQ", "definition"; "LINQ (Language Integrated Query) is a Microsoft programming model and methodology that essentially adds formal query capabilities into Microsoft .NET-based programming languages."}, {"disicpline": "NET", "term": "Object", "definition"; "An Object is an Instance of a Class. Here's the hierarchy:<br /><br />Class -> Instance -> Object<br /><br /><strong>Class</strong> - a mountain of functionality that is off stage.<br /><strong>Instance</strong> - creating a digital placeholder for that "mountain of functionality" that equates to me bringing all of that on to the stage.<br /><strong>Object</strong> - engaging that "mountain of functionality" in a way that translates to an actual task or value.<br /><br />You'll often see "Instance" and "Object" used interchangably. That's not a criminal thing to do but be aware of how "object" refers to a unique "instance" of a class because of the way an object has a the functionality in that Class actually <span style="text-decoration: underline;">doing</span> something."}, {"disicpline": "NET", "term": "REST", "definition"; "This is similiar to the protocol that you see in apps such as Code Igniter. The URL of the site isn't your typical ".htm" or ".php." Rather, it's a cue represented by some text that tells your program what to do. You see this a lot with the .NET architecture you're using. <br /><br /> <div class="quote">REST stands for "Representational State Transfer" and it is an architectural pattern for creating an API that uses HTTP as its underlying communication method. REST was originally conceived by Roy Fielding in his 2000 dissertation paper entitled "Architectural Styles and the Design of Network-based Software Architectures", chapter 5 cover REST specifically: http://www.ics.uci.edu/~fielding/pubs/dissertation/rest_arch_style.htm <br /><br /> Almost every device that is connected to the internet already uses HTTP; it is the base protocol that the internet is built on which is why it makes such a great platform for an API. (<a href="https://blogs.msdn.microsoft.com/martinkearn/2015/01/05/introduction-to-rest-and-net-web-api/" target="_blank">microsoft.com</a>)<br /><br /> You can see this referenced as one of several options a Microsoft Developer meight consider, as far as the infrastructure they would build atop the <a href="#soap">SOAP</a> philosophical foundation.</div>"}, {"disicpline": "NET", "term": "Service Layer", "definition"; "<a href="images/service_layer.jpg" target="_blank"><img style="float: right;" src="images/service_layer.jpg" alt="" width="192" height="205" border="0" /></a>The "layer" that exists between the client and the data that client is interacting with in the context of their visit to your website."}, {"disicpline": "NET", "term": "SOAP", "definition"; "Simple Object Access Protocol. Bottom line: This allows different computer langu<a href="images/api_why.jpg" target="_blank"><img style="float: right;" src="images/api_why.jpg" alt="" width="368" height="251" border="0" /></a>ages and platforms to "talk" with one another... <br /><br /> <div class="quote">SOAP (Simple Object Access Protocol) is a messaging protocol that allows programs that run on disparate operating systems (such as Windows and Linux) to communicate using Hypertext Transfer Protocol (HTTP) and its Extensible Markup Language (XML). Since Web protocols are installed and available for use by all major operating system platforms, HTTP and XML provide an at-hand solution that allows programs running under different operating systems in a network to communicate with each other. SOAP specifies exactly how to encode an HTTP header and an XML file so that a program in one computer can call a program in another computer and pass along information. SOAP also specifies how the called program can return a response. Despite its frequent pairing with HTTP, SOAP supports other transport protocols as well. (<a href="http://searchsoa.techtarget.com/definition/SOAP" target="_blank">techtarget</a>)<br /><br /></div> SOAP is the foundation upon which various Microsoft web paradigms have been built. All of them seek to streamline syntax as much as possible while simultaneously providing a universal way to communicate data, text and graphics to different operating systems. Among those platforms you have the following: <ul> <li>Web Service <ul> <li>It's based on SOAP and returns data in XML form.</li> <li>It supports only HTTP protocol.</li> <li>It is not open source but can be consumed by any client that understands xml.</li> <li>It can be hosted only on IIS.</li> </ul> </li> <li><img style="float: right;" src="images/api_because.jpg" alt="" width="342" height="144" />WCF <ul> <li>It is also based on SOAP and returns data in XML form.</li> <li>It is the evolution of the web service(ASMX) and supports various protocols like TCP, HTTP, HTTPS, Named Pipes, MSMQ.</li> <li>The main issue with WCF is it's tedious and extensive configuration.</li> <li>It is not open source but can be consumed by any client that understands xml.</li> <li>It can be hosted with in the applicaion or on IIS or using window service.</li> </ul> </li> <li>WCF Rest <ul> <li>To use WCF as WCF Rest service you have to enable webHttpBindings.</li> <li>It support HTTP GET and POST verbs by [WebGet] and [WebInvoke] attributes respectively.</li> <li>To enable other HTTP verbs you have to do some configuration in IIS to accept request of that particular verb on .svc files</li> <li>Passing data through parameters using a WebGet needs configuration. The UriTemplate must be specified</li> <li>It support XML, JSON and ATOM data format.</li> </ul> </li> <li>Web API <ul> <li>This is the new framework for building HTTP services with easy and simple way.</li> <li>Web API is open source an ideal platform for building REST-ful services over the .NET Framework.</li> <li>Unlike WCF Rest service, it use the full featues of HTTP (like URIs, request/response headers, caching, versioning, various content formats)</li> <li>It also supports the MVC features such as routing, controllers, action results, filter, model binders, IOC container or dependency injection, unit testing - all of which makes it more simple and robust.</li> <li>It can be hosted with in the application or on IIS.</li> <li>It has a lightweight architecture and is good for devices which have limited bandwidth like smart phones.</li> <li>Responses are formatted by Web API's MediaTypeFormatter into JSON, XML or whatever format you want to add as a MediaTypeFormatter.</li> </ul> </li> </ul> When to choose either WCF or WEB API <ul> <li>Choose WCF when you want to create a service that should support special scenarios such as one way messaging, message queues, duplex communication etc.</li> <li>Choose WCF when you want to create a service that can use fast transport channels when available, such as TCP, Named Pipes, or maybe even UDP (in WCF 4.5), and you also want to support HTTP when all other transport channels are unavailable.</li> <li>Choose Web API when you want to create a resource-oriented services over HTTP that can use the full features of HTTP (like URIs, request/response headers, caching, versioning, various content formats).</li> <li>Choose Web API when you want to expose your service to a broad range of clients including browsers, mobiles, iphone and tablets. (<a href="http://www.dotnettricks.com/learn/webapi/difference-between-wcf-and-web-api-and-wcf-rest-and-web-service" target="_blank">dotnettricks</a>)</li> </ul>"}, {"disicpline": "NET", "term": "WCF", "definition"; "One of several platforms that Microsoft offers that's built upon the SOAP philosophical foundation. See the "<a href="#soap">SOAP</a>" link at the top of this page."}, {"disicpline": "NET", "term": "XML", "definition"; "Extensible Markup Language. "Extensible" means, "capable of being extended." To understand XML, you've got to go back to HTML and unpack what HTML stands for. "HTML stands for "Hypertext Markup Language." "Markup Language" refers to a series of symbols or characters that are inserted in the context of a website or a Word Processing program that programmatically dictate how that text is to appear. <strong><<strong>, for example, is inserted prior to a word to cue the system that it needs to display a text in bold. <br /><br /> XML does the same kind of thing with data. And what makes that so useful is that it not only "communicates" data, it also communicates how that data is to be formatted... <br /><br /> <div class="quote">XML code, a formal recommendation from the World Wide Web Consortium (W3C), is similar to Hypertext Markup Language (HTML). Both XML and HTML contain markup symbols to describe page or file contents. HTML code describes Web page content (mainly text and graphic images) only in terms of how it is to be displayed and interacted with. <br /><br /> XML data is known as self-describing or self-defining, meaning that the structure of the data is embedded with the data, thus when the data arrives there is no need to pre-build the structure to store the data; it is dynamically understood within the XML. The XML format can be used by any individual or group of individuals or companies that want to share information in a consistent way. XML is actually a simpler and easier-to-use subset of the Standard Generalized Markup Language (SGML), which is the standard to create a document structure. (<a href="http://searchsoa.techtarget.com/definition/XML" target="_blank">techtarget</a>)</div>"}, {"disicpline": "Networking", "term": "file:// scheme", "definition"; "You have the option of using "file://" as opposed to "http://" in the context of your web address syntax, but you will generally use "file://" when you're retrieving files from your computer or drives that are mapped to your computer. In other words, you're not venturing out into the world wide web (www) to get your content. Click <a href="https://en.wikipedia.org/wiki/File_URI_scheme" target="_blank">here</a> for more info."}, {"disicpline": "Networking", "term": "IP address", "definition"; ""IP" stands for "Internet Protocol." When you're talking about an "IP address," you're referring to the numerical label that's put on every computer that's connected to a network. That could be a local network or it could be a server on the web. Everything has its own IP and that's what allows it to communicate and interact with other computers. Click <a href="http://whatismyipaddress.com/ip-facts" target="_blank">here</a> for more info."}, {"disicpline": "Networking", "term": "Permissions", "definition"; "Every website, every computer / server, has "permissions." Different users have different levels of accessibility and those are dictated by the network administrator. <a href="https://www.digitalocean.com/community/questions/proper-permissions-for-web-server-s-directory" target="_blank">Digital Ocean</a> and <a href="https://support.microsoft.com/en-us/help/313075/how-to-configure-web-server-permissions-for-web-content-in-iis" target="_blank">Microsoft</a> has some good info on this topic."}, {"disicpline": "Networking", "term": "Ping", "definition"; "When you're wanting to determine whether a particular IP address is valid and there's a legitimate presence on the other side of that value, you use "ping." Open up your command line interface and type in "ping your web address." If it's a valid site / resource, you'll get a return "package" that qualifies it as legitimate. Click <a href="http://smallbusiness.chron.com/ping-website-cmd-53939.html" target="_blank">here</a> for more info."}, {"disicpline": "PHP", "term": "Class", "definition"; "Some use the illustration of a "blueprint." Bottom line: It's a bunch of functionality that typically includes several methods as well as some other optional "helps" like Constructors and Properties etc. <br /><br />I like to think of it as a mini-machine. It's represented by a greyed-out button that you have to activate in order for the machine to start running. You activate it by something called "instantiation." At that point, the button is no longer greyed out and you can start taking advantage of whatever functionality it's bringing to the table!<br /><br />Examples of Classes are found thoughout the samples I've included below."}, {"disicpline": "PHP", "term": "Constructor", "definition"; "A Constructor assigns some values for you automatically as soon as the Class is instantitated. So, by default you have some data established that can be used by your Class or any "children," should you position your Class to be something another Class might inherit. <br /><br />You'll need to set up some "Properties" first and then use your Constructor to assign values to those Properties.<br /><br />Here's an example: <p><span style="color: #3366ff;">class Spreadsheet {<br /></span><span style="color: #3366ff;">     public $name; <span style="color: #008000;">//here's your property<br /></span></span><span style="color: #3366ff;">     function __construct() {          <br />     $this->name="Bruce"; <span style="color: #008000;">//here's your constructor giving the value "Bruce" to your "name" property          </span> <br />     echo $this->name;      <br />     } <br />}<br /></span><span style="color: #3366ff;">$new_spreadsheet = new Spreadsheet();<br /><br /><span style="color: #000000;">When you run this code, you'll get "Bruce."</span></span></p>"}, {"disicpline": "PHP", "term": "Encapsulation", "definition"; "Encapsulation refers to the way in you systemically organize and protect data within a class so it's not accessible to anyone other than methods within the same class. In other words, it's how you keep your data and functionality in the yard so it doesn't go running all over the neighborhood."}, {"disicpline": "PHP", "term": "Instance", "definition"; "In order to bring the functionality represented by a Class to bear, you have to "instantiate" it. That is, you have to create a Instance of that Class. Once you do that, the "greyed out" button that was that Class is now an "active" button. <br /><br />It looks like this:<br /><br /><span style="color: #3366ff;">class NewClass {</span><br /><br /><span style="color: #3366ff;">    public function something_wonderful() {</span><br /><span style="color: #3366ff;">     </span><br /><span style="color: #3366ff;">     echo "bring it";</span><br /><span style="color: #3366ff;">    </span><br /><span style="color: #3366ff;">     }</span><br /><br /><span style="color: #3366ff;">}</span><br /><br /><span style="color: #3366ff;">$say_something=new NewClass;</span> <span style="color: #339966;">//this is an "Instance" of the NewClass class</span>"}, {"disicpline": "PHP", "term": "JQuery", "definition"; "bring it"}, {"disicpline": "PHP", "term": "MCRYPT_RIJNDAEL_128", "definition"; "You would think that MCRYPT_RIJNDAEL_256 specifies 256-bit encryption, but that is wrong. The three choices specify the block-size to be used with Rijndael encryption. They say nothing about the key size (i.e. strength) of the encryption. (Read further to understand how the strength of the AES encryption is set.) <br><br> The Rijndael encyrption algorithm is a block cipher. <br><br> <div style="border-radius:10pt; border:1px solid #cccccc; width:600px; height:auto; padding:10px; margin:auto; box-shadow:10px 10px 5px #cccccc;">A "cipher" is a computer term that refers to an algorithm for performing encryption. A "block cipher" refers an algorithm that's performed on a fixed-length group of "bits.")</div> <br> It operates on discrete blocks of data. Padding MUST be added such that the data to be encrypted has a length that is a multiple of the block size. (PHP pads with NULL bytes) Thus, if you specify MCRYPT_RIJNDAEL_256, your encrypted output will always be a multiple of 32 bytes (i.e. 256 bits). If you specify MCRYPT_RIJNDAEL_128, your encrypted output will always be a multiple of 16 bytes. <br><br> <div style="border-radius:10pt; border:1px solid #cccccc; width:600px; height:auto; padding:10px; margin:auto; box-shadow:10px 10px 5px #cccccc;">A "bit" is the smallest unit of information that a computer can store. A "byte" is a collection of bits.</div></br> Note: Strictly speaking, AES is not precisely Rijndael (although in practice they are used interchangeably) as Rijndael supports a larger range of block and key sizes; AES has a fixed block size of 128 bits and a key size of 128, 192, or 256 bits, whereas Rijndael can be specified with key and block sizes in any multiple of 32 bits, with a minimum of 128 bits and a maximum of 256 bits. In summary: If you want to be AES compliant, always choose MCRYPT_RIJNDAEL_128. <br><br> <div style="border-radius:10pt; border:1px solid #cccccc; width:600px; height:auto; padding:10px; margin:auto; box-shadow:10px 10px 5px #cccccc;">AES stands for "<a href="https://www.boxcryptor.com/en/encryption/" target="_blank">Advanced Encryption Standard</a>" and is used by the NSA. You generally have two types of encryption: Aesymetric and Symetric. Aesymetric refers to the fact that you have both a public and a private key. Symetric is just one private key.</div><br> So the first step is to create the cipher object: <br><br> $cipher = mcrypt_module_open(MCRYPT_RIJNDAEL_128, '', MCRYPT_MODE_CBC, ''); <br><br> We're using CBC mode (cipher-block chaining). Block cipher modes are detailed here: <a href="http:en.wikipedia.org/wiki/Block_cipher_modes_of_operation" target="_blank">http:en.wikipedia.org/wiki/Block_cipher_modes_of_operation</a> <br><br> CBC mode requires an initialization vector. The size of the IV (initializationvector) is always equal to the block-size. (It is NOT equal to the key size.) Given that our block size is 128-bits, the IV is also 128-bits (i.e. 16 bytes). Thus, for AES encryption, the IV is always 16 bytes regardless of the strength of encryption. <br><br> Here's some PHP code to verify our IV size: <br><br> $iv_size = mcrypt_enc_get_iv_size($cipher);<br> printf("iv_size = %dn",$iv_size); <br><br> How do you do 256-bit AES encryption in PHP vs. 128-bit AES encryption??? The answer is: Give it a key that's 32 bytes long as opposed to 16 bytes long. <br><br> For example: <br><br> $key256 = '12345678901234561234567890123456';<br> $key128 = '1234567890123456'; <br><br> Here's our 128-bit IV which is used for both 256-bit and 128-bit keys. <br><br> $iv = '1234567890123456'; <br><br> printf("iv: %sn",bin2hex($iv));<br> printf("key256: %sn",bin2hex($key256));<br> printf("key128: %sn",bin2hex($key128));<br><br> This is the plain-text to be encrypted: <br><br> $cleartext = 'The quick brown fox jumped over the lazy dog';<br> printf("plainText: %snn",$cleartext); <br><br> The mcrypt_generic_init function initializes the cipher by specifying both the key and the IV. The length of the key determines whether we're doing 128-bit, 192-bit, or 256-bit encryption. Let's do 256-bit encryption here: <br><br> if (mcrypt_generic_init($cipher, $key256, $iv) != -1)<br> {<br> // PHP pads with NULL bytes if $cleartext is not a multiple of the block size.. <br><br> $cipherText = mcrypt_generic($cipher,$cleartext );<br> mcrypt_generic_deinit($cipher); <br><br> Display the result in hex. <br><br> printf("256-bit encrypted result:n%snn",bin2hex($cipherText));<br> } <br><br> Now let's do 128-bit encryption:<br><br> if (mcrypt_generic_init($cipher, $key128, $iv) != -1)<br> {<br><br> // PHP pads with NULL bytes if $cleartext is not a multiple of the block size.. <br><br> $cipherText = mcrypt_generic($cipher,$cleartext );<br> mcrypt_generic_deinit($cipher); <br><br> // Display the result in hex.<br> printf("128-bit encrypted result:n%snn",bin2hex($cipherText));<br< } <br><br> <hr><br> Results<br> <hr><br><br> You may use these as test vectors for testing your AES implementations... <br><br> <hr> 256-bit key, CBC mode<br> <hr><br> IV = '1234567890123456' <br> (hex: 31323334353637383930313233343536)<br> Key = '12345678901234561234567890123456' <br> (hex: 3132333435363738393031323334353631323334353637383930313233343536)<br><br> PlainText:<br> 'The quick brown fox jumped over the lazy dog'<br> CipherText(hex):<br> 2fddc3abec692e1572d9b7d629172a05caf230bc7c8fd2d26ccfd65f9c54526984f7cb1c4326ef058cd7bee3967299e3 <br><br> <hr> 128-bit key, CBC mode <hr> <br> IV = '1234567890123456' <br> (hex: 31323334353637383930313233343536)<br> Key = '1234567890123456' <br> (hex: 31323334353637383930313233343536)<br> PlainText:<br> 'The quick brown fox jumped over the lazy dog'<br> CipherText(hex):<br> f78176ae8dfe84578529208d30f446bbb29a64dc388b5c0b63140a4f316b3f341fe7d3b1a3cc5113c81ef8dd714a1c99<br>"}, {"disicpline": "PHP", "term": "Object", "definition"; "Although you'll sometimes hear Instance and Object used interchangeably, there are different.<br /><br />An Instance of a Class is my having put the key in the ignition and fired it up. It's no longer a dormant piece of machinery, it's running and ready to be engaged. <br /><br />An Object is something that machine has made - it's a result of that functionality. It looks like this:<br /><br /><span style="color: #3366ff;">class NewClass { </span> <span style="color: #3366ff;">    <br /><br />     public function something_wonderful() {<br /></span> <span style="color: #3366ff;">     </span> <span style="color: #3366ff;">     <br />     echo "bring it";</span> <span style="color: #3366ff;">    </span> <span style="color: #3366ff;">     <br />     <br />     }</span> <br /><br /><span style="color: #3366ff;">}</span> <span style="color: #3366ff;"> <br /><br />$say_something=new NewClass;</span> <span style="color: #339966;">//this is an "Instance" of the NewClass class</span> <span style="color: #3366ff;">$shout = $say_something->something_wonderful();</span> <span style="color: #339966;">//$shout is an Object of the NewClass Class </span>"}, {"disicpline": "PHP", "term": "PDO", "definition"; "PHP Data Objects. There are several advantages to using PDO. Here are a couple: <br /><br /> <span style="text-decoration: underline;">Database Abstraction Layer</span> - an API that allows you to connect with any one of a number of databases. <br /><br /> <span style="text-decoration: underline;">Prepared Statements</span> - here you're executing your SQL without any data battached to it. This is how you avoid SQL Injection. <br /><br /> So, this: <br /><br /> <span style="color: #3366ff;">$sql = "SELECT * from users where email='$email' AND status='$status'"</span> <br /><br /> Becomes this: <br /><br /> <span style="color: #3366ff;">$sql="SELECT * FROM users where email=? AND status=?";</span> <br /><br /> ...and then you would run the EXECUTE method of this object, so it would look like this: <br /><br /> <span style="color: #3366ff;">$stmt=$pdo->prepare("SELECT * FROM users WHERE email=? AND status=?"); $stmt->execute(['email=>$email, 'status=>$status]); $user=$stmt->fetch();</span>"}, {"disicpline": "PHP", "term": "Scope", "definition"; "Scope is a term that refers to the extent to which a variable makes sense. In other words, how logical does that variable appear to another method - one that didn't create the variable to begin with? <br /><br /><br />You've got four different types of "scope..."<br /><br />local<br />function<br />global<br />superglobal<br /><br />Scope is similiar to Visibility, but with Visibility you've got <br /><br />public<br />protected<br />private<br /><br />So, there is a difference in that scope is more about variables whereas you'll see visibility describing the accessibility of methods and properties more so than variables. <br /><br />One definition that struck me as being especially clear was, "Scope can be defined as the range of availability a variable has to the program in which it is declared." (<a href="https://www.tutorialspoint.com/php/php_static_variables.htm" target="_blank">tutorialspoint.com</a>)"}, {"disicpline": "PHP", "term": "Static", "definition"; "On occasion, in addition to seeing a variable or a method's visibility qualified in terms of either private, protected or public, you may also see it referenced as "static." "Static" is a handy tool in that it doesn't have to be instantiated. It can directly accessed using the Scope Resolution Operator(::). For example: $con=DatabaseFactory::CreateLegacyAegisHealthConnection(); CreateLegacyAegisHealthConnection() is a static function in the DatabaseFactory Class. I didn't have to write: $new_con=new DatabaseFactory(); $new_connection=$new_con->CreateLegacyHealthConnection(). I just used the Scope Resolution Operator and, "BAM!" it's right there! Same dynamic applies to both Methods and Properties."}, {"disicpline": "PHP", "term": "Superglobal Variable", "definition"; "<p>Global variables are accessible from any class, method or function from anywhere in the application. Public, Private, Protected, Child, Parent - doesn't matter. If it's a Superglobal variable, you can grab it and use it and you only have to define it once.<br /><br />An example would be $_SESSION. That's considered a Superglobal variable in that PHP knows what $_SESSION is. You still have to give it a value, but you don't have to "define" $_SESSION anymore than you have to "define" $_POST or $_GET. PHP knows what those variables are. Again, you still have to give them a value, but systemically, PHP is not looking for that variable, it already knows what it is. <br /><br />You have the same kind of utility available to you with a "Global" variable, but, unlike a Superglobal variable, you have to define it. Whereas $_SESSION is understood by PHP, $george, on the other hand, is a total mystery. <br /><br />$george could be your database connection, but in order to give it "wings" so it can fly freely throughout your app, you have to make it a global variable like this:<br /><br />Here's your database connection script:<br /><br /><span style="color: #3366ff;">$mysqli = new mysqli($host,$user,$password,$database);</span><br /><span style="color: #3366ff;"> if($mysqli->connect_errno) {  </span><br /><span style="color: #3366ff;">$err="CONNECT FAIL: "  </span><br /><span style="color: #3366ff;">.$mysqli->connect_errno  </span><br /><span style="color: #3366ff;">. ' '  </span><br /><span style="color: #3366ff;">.$mysqli->connect_error  ;  </span><br /><span style="color: #3366ff;">trigger_error($err, E_USER_ERROR); </span><br /><span style="color: #3366ff;">}</span><br /><br />Now here's my class:<br /><br /><span style="color: #3366ff;">class List {</span><br /><span style="color: #3366ff;"> </span><br /><span style="color: #3366ff;">     public spreadsheet () {</span><br />          <span style="color: #3366ff;">global <strong><span style="color: #ff0000;">$mysqli;</span></strong></span><br /><span style="color: #3366ff;">          $sql="select * from table";</span><br /><span style="color: #3366ff;">          $query=<span style="color: #ff0000;"><strong>$mysqli</strong>-></span>query($sql);</span><br /><br /><span style="color: #3366ff;">     }</span><br /><br /><span style="color: #3366ff;">}</span><br /><br />I've just told my code to go look for $mysqli. It could be anywhere, but by prefacing $mysqli with "global," I'm giving my code permission to go and look anywhere and everywhere for the $mysqli variable.</p>"}, {"disicpline": "PHP", "term": "Visibility", "definition"; "Visibily is something similiar to Scope, but it's more for methods and properties. <br /><br />There are three types of visibility which are described below:<br /><br /><span style="color: #0000bb;"><span style="font-family: Courier New;"><!--?php </span--></span><span style="font-family: Courier New;"><span style="color: #ff8000;">/**  * Define MyClass  */ <br /><br /></span><span style="color: #007700;">class </span></span><span style="color: #0000bb;"><span style="font-family: Courier New;">MyClass </span></span><span style="font-family: Courier New;"><span style="color: #007700;">{     <br /><br />public </span><span style="color: #0000bb;">$public </span><span style="color: #007700;">= </span><span style="color: #dd0000;">'Public'</span></span><span style="font-family: Courier New;"><span style="color: #007700;">;    <br />protected </span><span style="color: #0000bb;">$protected </span><span style="color: #007700;">= </span><span style="color: #dd0000;">'Protected'</span></span><span style="font-family: Courier New;"><span style="color: #007700;">;     <br />private </span><span style="color: #0000bb;">$private </span><span style="color: #007700;">= </span><span style="color: #dd0000;">'Private'</span></span><span style="font-family: Courier New;"><span style="color: #007700;">;<br />    <br />     function </span><span style="color: #0000bb;">printHello</span></span><span style="font-family: Courier New;"><span style="color: #007700;">(){         <br />     echo </span><span style="color: #0000bb;">$this</span><span style="color: #007700;">-></span><span style="color: #0000bb;">public</span></span><span style="font-family: Courier New;"><span style="color: #007700;">;         <br />     echo </span><span style="color: #0000bb;">$this</span><span style="color: #007700;">-></span><span style="color: #0000bb;">protected</span></span><span style="font-family: Courier New;"><span style="color: #007700;">;         <br />     echo </span><span style="color: #0000bb;">$this</span><span style="color: #007700;">-></span><span style="color: #0000bb;">private</span></span><span style="font-family: Courier New;"><span style="color: #007700;">;     <br />     } <br />}<br /></span><span style="color: #0000bb;"><br />$obj </span><span style="color: #007700;">= new </span><span style="color: #0000bb;">MyClass</span></span><span style="font-family: Courier New;"><span style="color: #007700;">(); <br />echo </span><span style="color: #0000bb;">$obj</span><span style="color: #007700;">-></span><span style="color: #0000bb;">public</span><span style="color: #007700;">; </span></span><span style="font-family: Courier New;"><span style="color: #ff8000;">// Works <br /></span><span style="color: #007700;">echo </span><span style="color: #0000bb;">$obj</span><span style="color: #007700;">-></span><span style="color: #0000bb;">protected</span><span style="color: #007700;">; </span></span><span style="font-family: Courier New;"><span style="color: #ff8000;">// Fatal Error <br /></span><span style="color: #007700;">echo </span><span style="color: #0000bb;">$obj</span><span style="color: #007700;">-></span><span style="color: #0000bb;">private</span><span style="color: #007700;">; </span></span><span style="font-family: Courier New;"><span style="color: #ff8000;">// Fatal Error <br /></span><span style="color: #0000bb;">$obj</span><span style="color: #007700;">-></span><span style="color: #0000bb;">printHello</span><span style="color: #007700;">(); </span></span><span style="font-family: Courier New;"><span style="color: #ff8000;">// Shows Public, Protected and Private<br /> <br />/**  * Define MyClass2  */ <br /><br /></span><span style="color: #007700;">class </span><span style="color: #0000bb;">MyClass2 </span><span style="color: #007700;">extends </span></span><span style="color: #0000bb;"><span style="font-family: Courier New;">MyClass </span></span><span style="color: #007700;"><span style="font-family: Courier New;">{     <br /></span></span><span style="font-family: Courier New;"><span style="color: #ff8000;">// We can redeclare the public and protected method, but not private     <br /><br />    </span><span style="color: #007700;">public </span><span style="color: #0000bb;">$public </span><span style="color: #007700;">= </span><span style="color: #dd0000;">'Public2'</span></span><span style="font-family: Courier New;"><span style="color: #007700;">;     <br />    protected </span><span style="color: #0000bb;">$protected </span><span style="color: #007700;">= </span><span style="color: #dd0000;">'Protected2'</span></span><span style="font-family: Courier New;"><span style="color: #007700;">;<br />    <br />     function </span><span style="color: #0000bb;">printHello</span></span><span style="font-family: Courier New;"><span style="color: #007700;">(){         <br />     echo </span><span style="color: #0000bb;">$this</span><span style="color: #007700;">-></span><span style="color: #0000bb;">public</span></span><span style="font-family: Courier New;"><span style="color: #007700;">;         <br />     echo </span><span style="color: #0000bb;">$this</span><span style="color: #007700;">-></span><span style="color: #0000bb;">protected</span></span><span style="font-family: Courier New;"><span style="color: #007700;">;         <br />     echo </span><span style="color: #0000bb;">$this</span><span style="color: #007700;">-></span><span style="color: #0000bb;">private</span></span><span style="font-family: Courier New;"><span style="color: #007700;">;     <br />     } <br />}<br /></span><span style="color: #0000bb;"><br />$obj2 </span><span style="color: #007700;">= new </span><span style="color: #0000bb;">MyClass2</span></span><span style="font-family: Courier New;"><span style="color: #007700;">(); <br />echo </span><span style="color: #0000bb;">$obj2</span><span style="color: #007700;">-></span><span style="color: #0000bb;">public</span><span style="color: #007700;">; </span></span><span style="font-family: Courier New;"><span style="color: #ff8000;">// Works <br /></span><span style="color: #007700;">echo </span><span style="color: #0000bb;">$obj2</span><span style="color: #007700;">-></span><span style="color: #0000bb;">protected</span><span style="color: #007700;">; </span></span><span style="font-family: Courier New;"><span style="color: #ff8000;">// Fatal Error <br /></span><span style="color: #007700;">echo </span><span style="color: #0000bb;">$obj2</span><span style="color: #007700;">-></span><span style="color: #0000bb;">private</span><span style="color: #007700;">; </span></span><span style="font-family: Courier New;"><span style="color: #ff8000;">// Undefined </span><span style="color: #0000bb;">$<br /><br />obj2</span><span style="color: #007700;">-></span><span style="color: #0000bb;">printHello</span><span style="color: #007700;">(); </span></span><span style="font-family: Courier New;"><span style="color: #ff8000;">// Shows Public2, Protected2, Undefined<br /><br /></span><span style="color: #0000bb;">?></span> <br /><br /><strong><img style="float: right;" src="/images/properties.jpg" alt="" width="300" height="300" /><span style="font-family: arial,helvetica,sans-serif;">public:</span></strong><span style="font-family: arial,helvetica,sans-serif;"> Public properties and methods can be accessed anywhere in a script after the object has been instantiated</span><br /><br /><span style="font-family: arial,helvetica,sans-serif;"><strong>protected:</strong> Protected properties and methods can be accessed only within the class that defines them, parent classes, or inherited classes</span><br /><br /><span style="font-family: arial,helvetica,sans-serif;"><strong>private:</strong> Private properties and methods can only be accessed by the class that defines them</span><br /></span></span>"}]}
B) Other Databases (back to top...) You can see how to build other interfaces that connect with different databases by clicking here. You can use directives to bind application data to the attributes of HTML DOM elements. A) ng-disabled (back to top...) "ng-disabled" give you a Angular way of disabling a button. With this application, you're binding "mySwitch" to the HTML button's disabled attribute. When it's "true," it's disabled. When it's "false," the button becomes active. Here's the code: <div ng-app="" ng-init="mySwitch=true"> <br><br> <button ng-disabled="mySwitch">click me</button> <br><br> <input type="checkbox" ng-model="mySwitch">Button <br><br> {{ mySwitch }} </div> And here it is in real life:
What's happening here is that the value of "mySwitch" is set to true which means the button is disabled. The checkbox sets it as "false" which then activates the button. B) ng-show / ng-hide (back to top...) "ng-show" either shows or hids an HTML element and you can change the visibility of the HTML element by using any expression that evaluates to true or false. Here's my very first "original" script to demo the "ng-hide" directive using an interactive text field to set the visibility. <div ng-app="myApp" ng-controller="myController"> <input ng-model="hour"> <p>{{hour}}</p> <p ng-show="hour > 12"><img src="http://brucegust.com/images/signature.jpg"></p> </div> Enter in a value greater than 12 and the "Bgust" signature will show up. <script> var app = angular.module('myApp', []); app.controller('myController', function($scope) { $scope.hour="12"; }); </script> And here's that script in real life...
AngularJS has its own HTML events directives. A) List of Event Listeners (back to top...) B) Mouse Events Mouse Events occur when the cursor moves over an element in this order: Or when a mouse button is clicked on an element, in this order: ...and you can add these events to any HTML element. Here's some examples: 1) Mouseover (back to top...) This is cool. Mouseover the text below... Here's the code:
<div class="inner_code_frame"><div ng-app="myApp" ng-controller="myController"> <h1 ng-mousemove="count = count + 1">Mouse over me!</h1> <h2>{{count}}</h2> </div> <script> var app = angular.module('myApp', []); app.controller('myController', function($scope) { $scope.count = 0; }); </script> </div>
And here it is in real life:
2) ng-click (back to top...) The "ng-click" directive defines the AngularJS code that will fire when user clicks on the element. <div ng-app="myApp" ng-controller="myController"> <button ng-click="count = count+1">Click Me!</button> <p>{{ count }}</p> </div> <script> var app = angular.module('myApp', []); app.controller('myController', function($scope) { $scope.count = 0; }); </script>
i) ng-click (back to top...) You can also use the "ng-click" to trigger a function... <div ng-app="myApp" ng-controller="myController"> <button ng-click="myFunction()">Click Me!</button> <p>{{ count }}</p> </div> <script> var app = angular.module('myApp', []); app.controller('myController', function($scope) { $scope.count = 0; $scope.myFunction = function() { $scope.count++; } }); </script>
3) $event object(back to top...) You can pass the $event object as an argument when calling the function. Take a look at this "x and y coordinate" function. <div ng-app="myApp" ng-controller="myController"> <h1 ng-mousemove="myFunc($event)">Mouse Over Me!</h1> <p>Coordinates: {{x + ', ' + y}}</p> </div> <script> var app = angular.module('myApp', []); app.controller('myController', function($scope) { $scope.myFunc = function(myE) { $scope.x = myE.clientX; $scope.y = myE.clientY; } }); </script>
4) Toggle True / False (back to top...) You can show / hide an element with this cool little toggle switch. <div ng-app="myApp" ng-controller="myController"> <button ng-click="myFunc()">Click Me!</button> <div ng-show="showMe"> <h1>Menu:</h1> <div>Pizza</div> <div>Pasta</div> <div>Pesce</div> </div> </div> <script> var app = angular.module('myApp', []); app.controller('myController', function($scope) { $scope.showMe = false; $scope.myFunc = function() { $scope.showMe = !$scope.showMe; // this makes the "showMe" value the opposite of whatever it is currently } }); </script>
Forms in AngularJS provide data-binding and validation of input controls. Cool stuff! A) Data Binding (back to top...) Input controls provides data binding by using the "ng-model" directive. 1) Input Text (back to top...) <input type="text" ng-model="firstname"> The application now has a property named, "firstname." The "ng-model" directive binds the input controller to the rest of your Angular app and the property, "firstname" can be referred to in a controller. 2) Checkbox (back to top...) Same kind of thing, you're just using the binding directive on a checkbox... <input type="checkbox" ng-model="myVar"> 3) Radio Button / SELECT (back to top...) You're going to use the "ng-model" to bind the radio button to your input controller just like above. As a matter of fact, you're going to use the same principal with your SELECT pulldown as well. Like this: Pick a topic: <input type="radio" ng-model="myVar" value="dogs">Dogs <input type="radio" ng-model="myVar" value="tuts">Tutorials <input type="radio" ng-model="myVar" value="cars">Cars </form> //and here's your select <select ng-model="myVar"> <option value=""> <option value="dogs">Dogs <option value="tuts">Tutorials <option value="cars">Cars </select> And when you put all this together with the script that's going to accommodate it, it looks like this:
<div ng-app="myApp" ng-controller="formController">//notice I've got one controller and one "form" for all of the different functionalities You've got several dynamics going on here at the same time. <br><br> - the "First Name" field demonstrates how through the use of "data-binding" you can bind a value to a form element and refer to it elsewhere on the same page. As you enter the name in the field, you'll see it appear below... <br><br> <form> First Name: <input type="text" ng-model="firstname"><br> </form> <br> You entered {{ firstname }}! <br><br> - the checkbox can be used as a toggle switch to change the visibility of a DOM element (click on the checkbox). <br><br> <form> <input type="checkbox" ng-model="myVar"> </form> <h1 ng-show="myVar">Yo, dog!</h1> <br> - using radio buttons, you can display different blocks of text, which can be nice... <br><br> Pick a topic... <br> <form> <input type="radio" ng-model="theVar" value="dogs">Dogs //same directive, but a different variable <input type="radio" ng-model="theVar" value="tutorials">Tutorials <input type="radio" ng-model="theVar" value="cars">Cars </form> <br>The ng-switch directive hides and shows HTML sections depending on the value of the radio buttons... <br> <div ng-switch="theVar"> <div ng-switch-when="dogs"> <h1>Dogs</h1> <p>Welcome to the world of dogs!</p> </div> <div ng-switch-when="tutorials"> <h1>Learn from these examples!</p> </div> <div ng-switch-when="cars"> <h1>Cars</h1> <p>Ka-chow!</p> </div> </div> <br> - you can also bind select boxes tog your application using the ng-model directive. It's the same kind of dynamic as with your radio buttons <br> <form> Select a topic: <select ng-model="bigVar"> //same directive, but a different variable <option value=""></option> <option value="dogs">Dogs</option> <option value="tutorials">Tutorials</option> <option value="cars">Cars</option> </select> </form> <br>The ng-switch directive hides and shows HTML sections depending on the value of the (now) SELECT... <br> <div ng-switch="bigVar"> <div ng-switch-when="dogs"> <h1>Dogs</h1> <p>Welcome to the world of dogs!</p> </div> <div ng-switch-when="tutorials"> <h1>Learn from these examples!</p> </div> <div ng-switch-when="cars"> <h1>Cars</h1> <p>Ka-chow!</p> </div> </div> </div> <script> var app = angular.module('myApp', []); app.controller('formController', function($scope) { $scope.firstname = "John"; }); </script>
Here's how all of this looks in real time...
4) Form Application (back to top...) Here's some practical form elements with some Angular enhancements...
<div ng-app="myApp" ng-controller="formController"> <form novalidate> First Name:<br> <input type="text" ng-model="user.firstName"><br> Last Name:<br> <input type="text" ng-model="user.lastName"> <br><br> <button ng-click="reset()">reset</button> </form> <p>form = {{user}}</p> <p>master = {{master}}</p> </div> <script> var app = angular.module('myApp', []); app.controller('formController', function($scope) { $scope.master = {firstName:"John", lastName:"Doe"}; $scope.reset=function() { $scope.user = angular.copy($scope.master); }; $scope.reset(); }); </script>
With Angular you've got a pretty verbose way of validating form input. A) Field Required / Email Validation Watch what happens when you enter characters into the text field and also try to enter an email address into the email field... <body style="white-space: normal;" ng-app=""> //notice how your body tag has the "ng-app" dynamic attached to it Try writing into the text field: <br><br> <form name="myForm"> <input name="myInput" ng-model="myInput" required> <br><br> This will validate a legitimate email address... <br><br> <input type="email" name="emailInput" ng-model="emailInput" </form> <p>The input's valid state is...</p> text field: <b>{{myForm.myInput.$valid}}</b> <br><br> email is valid... <b>{{myForm.emailInput.$valid}}</b> And in real time...
B) Form and Input State (back to top...) AngularJS is constantly updating the state of both the form and the input fields. Input fields have the following "states..." These are all properties of a field and they're all set to either "true" or "false." Forms have the following states: And these are the properties for your form and they are either true or false. You can use these states to show relevant messages to your user. For example, if a field is required and the user leaves it blank, you can give the user a warning message... Here's the code: <body style="white-space: normal;" ng-app=""> Try clicking the "Name" field, but then moving on and leaving it blank... <br><br> <form name="myForm"> Name: <input name="myName" ng-model="myName" required> <span ng-show="myForm.myName.$touched && myForm.myName.$invalid">The name is required</span> <br><br> This will validate a legitimate email address... <br><br> <input name="myAddress" ng-model="myAddress" required> </form> <br> You're using the ng-show directive to display an error message only if the field has been "touched" AND is empty. And in real time:
Angular API is a set of global JavaScript functions for performing tasks like: ... all of these are accessed using the Angular object. Here's a list of some common API functions:
angular.lowercase converts a string to lowercase
angular.uppercase converts a string to uppercase
angular.isString() returns true if the reference is a string
angular.isNumber() returns true if the reference is a number
Here are some examples: A) Examples (lowercase, uppercase, isString, isNumber) (back to top...) Here's an example of lowercase, uppercase, isString and isNumber... <div ng-app="myApp" ng-controller="myController"> <b>Here's an example of Angular converting an uppercase string to a lowercase string using "angular.lowercase()..."</b> <p>{{ x1 }}</p> <p>{{ x2 }}</p> <b>Here's an example of Angular converting an lowercase string to a uppercase string using "angular.uppercase()..."</b> <p>{{ x3 }}</p> <p>{{ x4 }}</p> <b>Here's Angular proofing a variable to ensure that it's a string...</b> <p>{{ x5 }}</p> <p>{{ x6 }}</p> <b>Finally, here's Angular proofing a variable to test whether or not it's a number / integer...</b> <p>{{ x7 }}</p> <p>{{ x8 }}</p> </div> <script> var app = angular.module('myApp', []); app.controller('myController', function($scope) { $scope.x1 = "BRUCE"; $scope.x2 = angular.lowercase($scope.x1); $scope.x3 = "david"; $scope.x4 = angular.uppercase($scope.x3); $scope.x5 = "Gust"; $scope.x6 = angular.isString($scope.x5); $scope.x7 = "Gust"; $scope.x8 = angular.isNumber($scope.x7); }); </script> ...and here you go in real time:
W3.CSS is a modern CSS framework that features built in resposiveness. And, it plays very nicely with Angular...! A) Example of Form Using Angular and W3.CSS (back to top...) First off, you're going to include this stylesheet in your header: <link rel="stylesheet" href="https://www.w3schools.com/w3css/4/w3.css"> Second, you're going to include the whole of your table and components within your app. This is similar to what we did before when your <body/> tag had your "ng-app" dynamic. Here it is:
<!DOCTYPE html> <html> <link rel="stylesheet" href="/w3css/4/w3.css"> <script src="https://ajax.googleapis.com/ajax/libs/angularjs/1.6.4/angular.min.js"></script> <body ng-app="myApp" ng-controller="userCtrl"> <div class="w3-container"> <h3>Users</h3> <table class="w3-table w3-bordered w3-striped"> <tr> <th>Edit</th> <th>First Name</th> <th>Last Name</th> </tr> <tr ng-repeat="user in users"> <td> <button class="w3-btn w3-ripple" ng-click="editUser(user.id)">✎ Edit</button> </td> <td>{{ user.fName }}</td> <td>{{ user.lName }}</td> </tr> </table> <br> <button class="w3-btn w3-green w3-ripple" ng-click="editUser('new')">✎ Create New User</button> <form ng-hide="hideform"> <h3 ng-show="edit">Create New User:</h3> <h3 ng-hide="edit">Edit User:</h3> <label>First Name:</label> <input class="w3-input w3-border" type="text" ng-model="fName" ng-disabled="!edit" placeholder="First Name"> <br> <label>Last Name:</label> <input class="w3-input w3-border" type="text" ng-model="lName" ng-disabled="!edit" placeholder="Last Name"> <br> <label>Password:</label> <input class="w3-input w3-border" type="password" ng-model="passw1" placeholder="Password"> <br> <label>Repeat:</label> <input class="w3-input w3-border" type="password" ng-model="passw2" placeholder="Repeat Password"> <br> <button class="w3-btn w3-green w3-ripple" ng-disabled="error || incomplete">✔ Save Changes</button> </form> </div> <script src= "myUsers.js"></script> </body> </html>
And here it is for real...
With Angular JS, you can include HTML content using the ng-include directive... A) Basic Example (back to top...) It's important to realize that while the "include" dynamic may appear to be similar to the "GET" directive, the "include" dynamic can retrieve not just basic HTML data, but even code that's being excecuted within the page. Here's a basic example: <body ng-app=""> <div ng-include="'wuddup.htm'"></div> </body> BTW: The "wuddup.htm" file is just text. There's no header, no HTML info in it at all. That's significant because with it just being text, it inherited all of the CSS information on the host page. Real time...
A) Include Angular Code (back to top...) You can also include files that contain Angular code within itself. So you're "including" Angular code as well as basic html syntax. Like this (three files are referenced here):
// here's your main page <body> <div ng-app="myApp" ng-controller="customersCtrl"> <div ng-include="'myTable.htm'"></div> </div> <script> var app = angular.module('myApp', []); app.controller('customersCtrl', function($scope, $http) { $http.get("customers.php").then(function (response) { $scope.names = response.data.records; }); }); </script> </body> // here's your "myTable.htm" file <table> <tr ng-repeat="x in names"> <td>{{ x.Name }}</td> <td>{{ x.Country }}</td> </tr> </table> // and here's your "customers.php" page... { "records": [ { "Name": "Alfreds Futterkiste", "City": "Berlin", "Country": "Germany" }, { "Name": "Ana Trujillo Emparedados y helados", "City": "México D.F.", "Country": "Mexico" }, { "Name": "Antonio Moreno Taquería", "City": "México D.F.", "Country": "Mexico" }, { "Name": "Around the Horn", "City": "London", "Country": "UK" }, { "Name": "B's Beverages", "City": "London", "Country": "UK" }, { "Name": "Berglunds snabbköp", "City": "Luleå", "Country": "Sweden" }, { "Name": "Blauer See Delikatessen", "City": "Mannheim", "Country": "Germany" }, { "Name": "Blondel père et fils", "City": "Strasbourg", "Country": "France" }, { "Name": "Bólido Comidas preparadas", "City": "Madrid", "Country": "Spain" }, { "Name": "Bon app'", "City": "Marseille", "Country": "France" }, { "Name": "Bottom-Dollar Marketse", "City": "Tsawassen", "Country": "Canada" }, { "Name": "Cactus Comidas para llevar", "City": "Buenos Aires", "Country": "Argentina" }, { "Name": "Centro comercial Moctezuma", "City": "México D.F.", "Country": "Mexico" }, { "Name": "Chop-suey Chinese", "City": "Bern", "Country": "Switzerland" }, { "Name": "Comércio Mineiro", "City": "São Paulo", "Country": "Brazil" } ] }
In real time...
C) Include Cross Domains (back to top...) You can bring in content from another domain provided the header of the site you're retrieving info has this in the header: <?php header("Access-Control-Allow-Origin: *"); ?> Here's the Angular code: <body ng-app="myApp"> <div ng-include="'https://tryit.w3schools.com/angular_include.php'"></div> <script> var app = angular.module('myApp', []); app.config(function($sceDelegateProvider) { $sceDelegateProvider.resourceUrlWhitelist([ 'https://tryit.w3schools.com/**' ]); }); </script> </body> And here you go in real time:
This is pretty straight forward. You're going to need two things: